

- Sign in with your email and password, or with Google
- Then confirm using:
- A 6-digit code from an authenticator app (TOTP), or
- A one-time recovery code as backup
How 2FA works in Chatbase
- Per user, not per workspace. 2FA is set on your personal account. There’s no workspace setting that requires 2FA for all members, so each member turns it on themselves.
- Owners can’t reset it for others. Nothing in member management changes another user’s 2FA. Only you can remove 2FA from your own account.
- Authenticator app only. The only method is Authenticator App (TOTP), for example Google Authenticator, 1Password, or Authy. SMS codes and passkeys aren’t supported.
- Applies to every sign-in method. If 2FA is on, you’re asked for a code after signing in with Google too.
Enable 2FA for your account
1
Open your account security settings
- Sign in to the Chatbase dashboard.
- Click your avatar at the bottom-left of the sidebar.
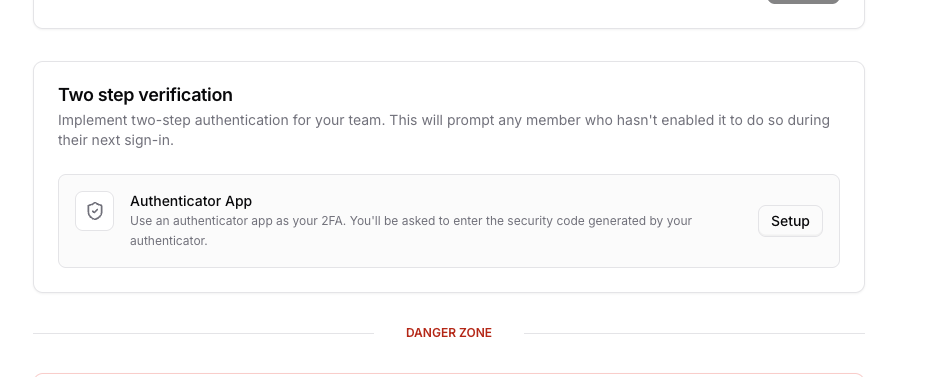
- Select Account settings and open the Two step verification section.
2
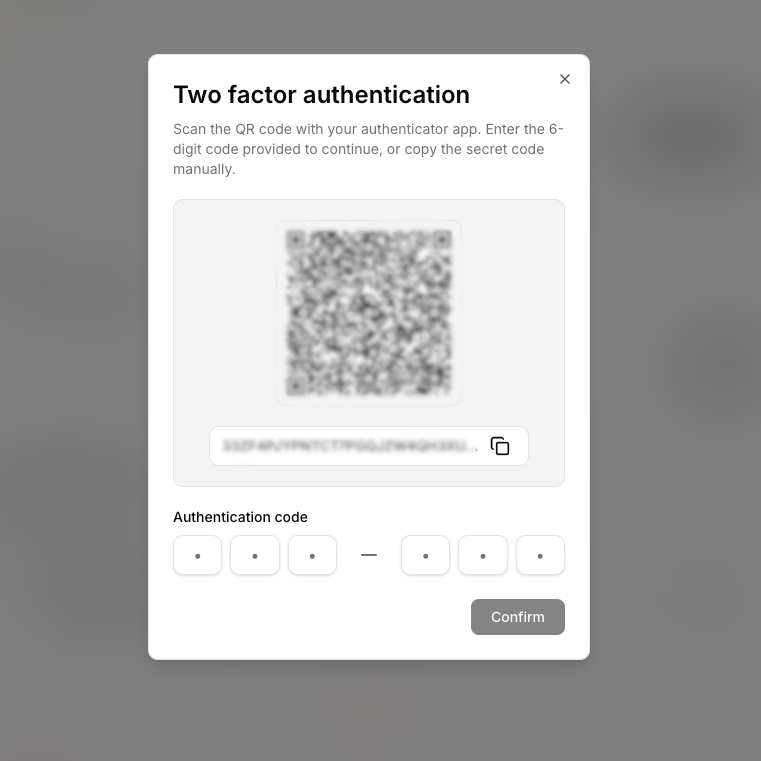
Scan the QR code with your authenticator app
- Select Set up two-step verification.
- Open your authenticator app (for example, Google Authenticator, 1Password, or Authy).
- Scan the QR code shown in Chatbase.
3
Confirm with a 6-digit code
- In Chatbase, enter the 6-digit code from your authenticator app.
- Select Confirm to finish setup.
After confirmation, you’ll be prompted for a 2FA code the next time you sign in.
4
Save your recovery codes
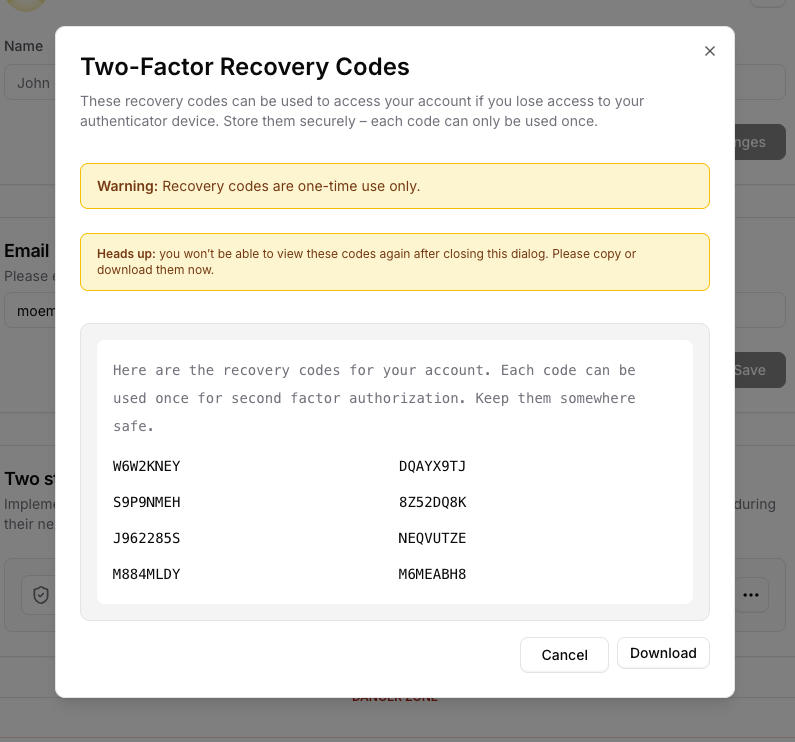
When setup succeeds, the Manage recovery codes dialog opens and generates your first set of recovery codes automatically. Copy or download them before closing the dialog.
Recovery codes
Recovery codes let you sign in when you don’t have access to your authenticator app (for example, if you lost your phone). Key rules:- You get 8 codes, each 8 characters long
- You see recovery codes only once when you generate them
- Each code is single-use (“Warning: Recovery codes are one-time use only”)
- Generating a new set of codes invalidates all previous codes
Generate and download recovery codes
- In the Chatbase dashboard, go to Account settings > Two step verification.
- Open Manage recovery codes.
- Select Generate codes.
- Copy or download the codes and store them securely.
Sign in with 2FA
When 2FA is enabled, the sign-in flow looks like this:- Enter your email and password as usual, or sign in with Google.
- If your account requires 2FA, Chatbase redirects you to a Two-factor authentication page.
- On this page you can:
- Enter a 6-digit code from your authenticator app, or
- Select Use a recovery code and enter one of your single-use codes.
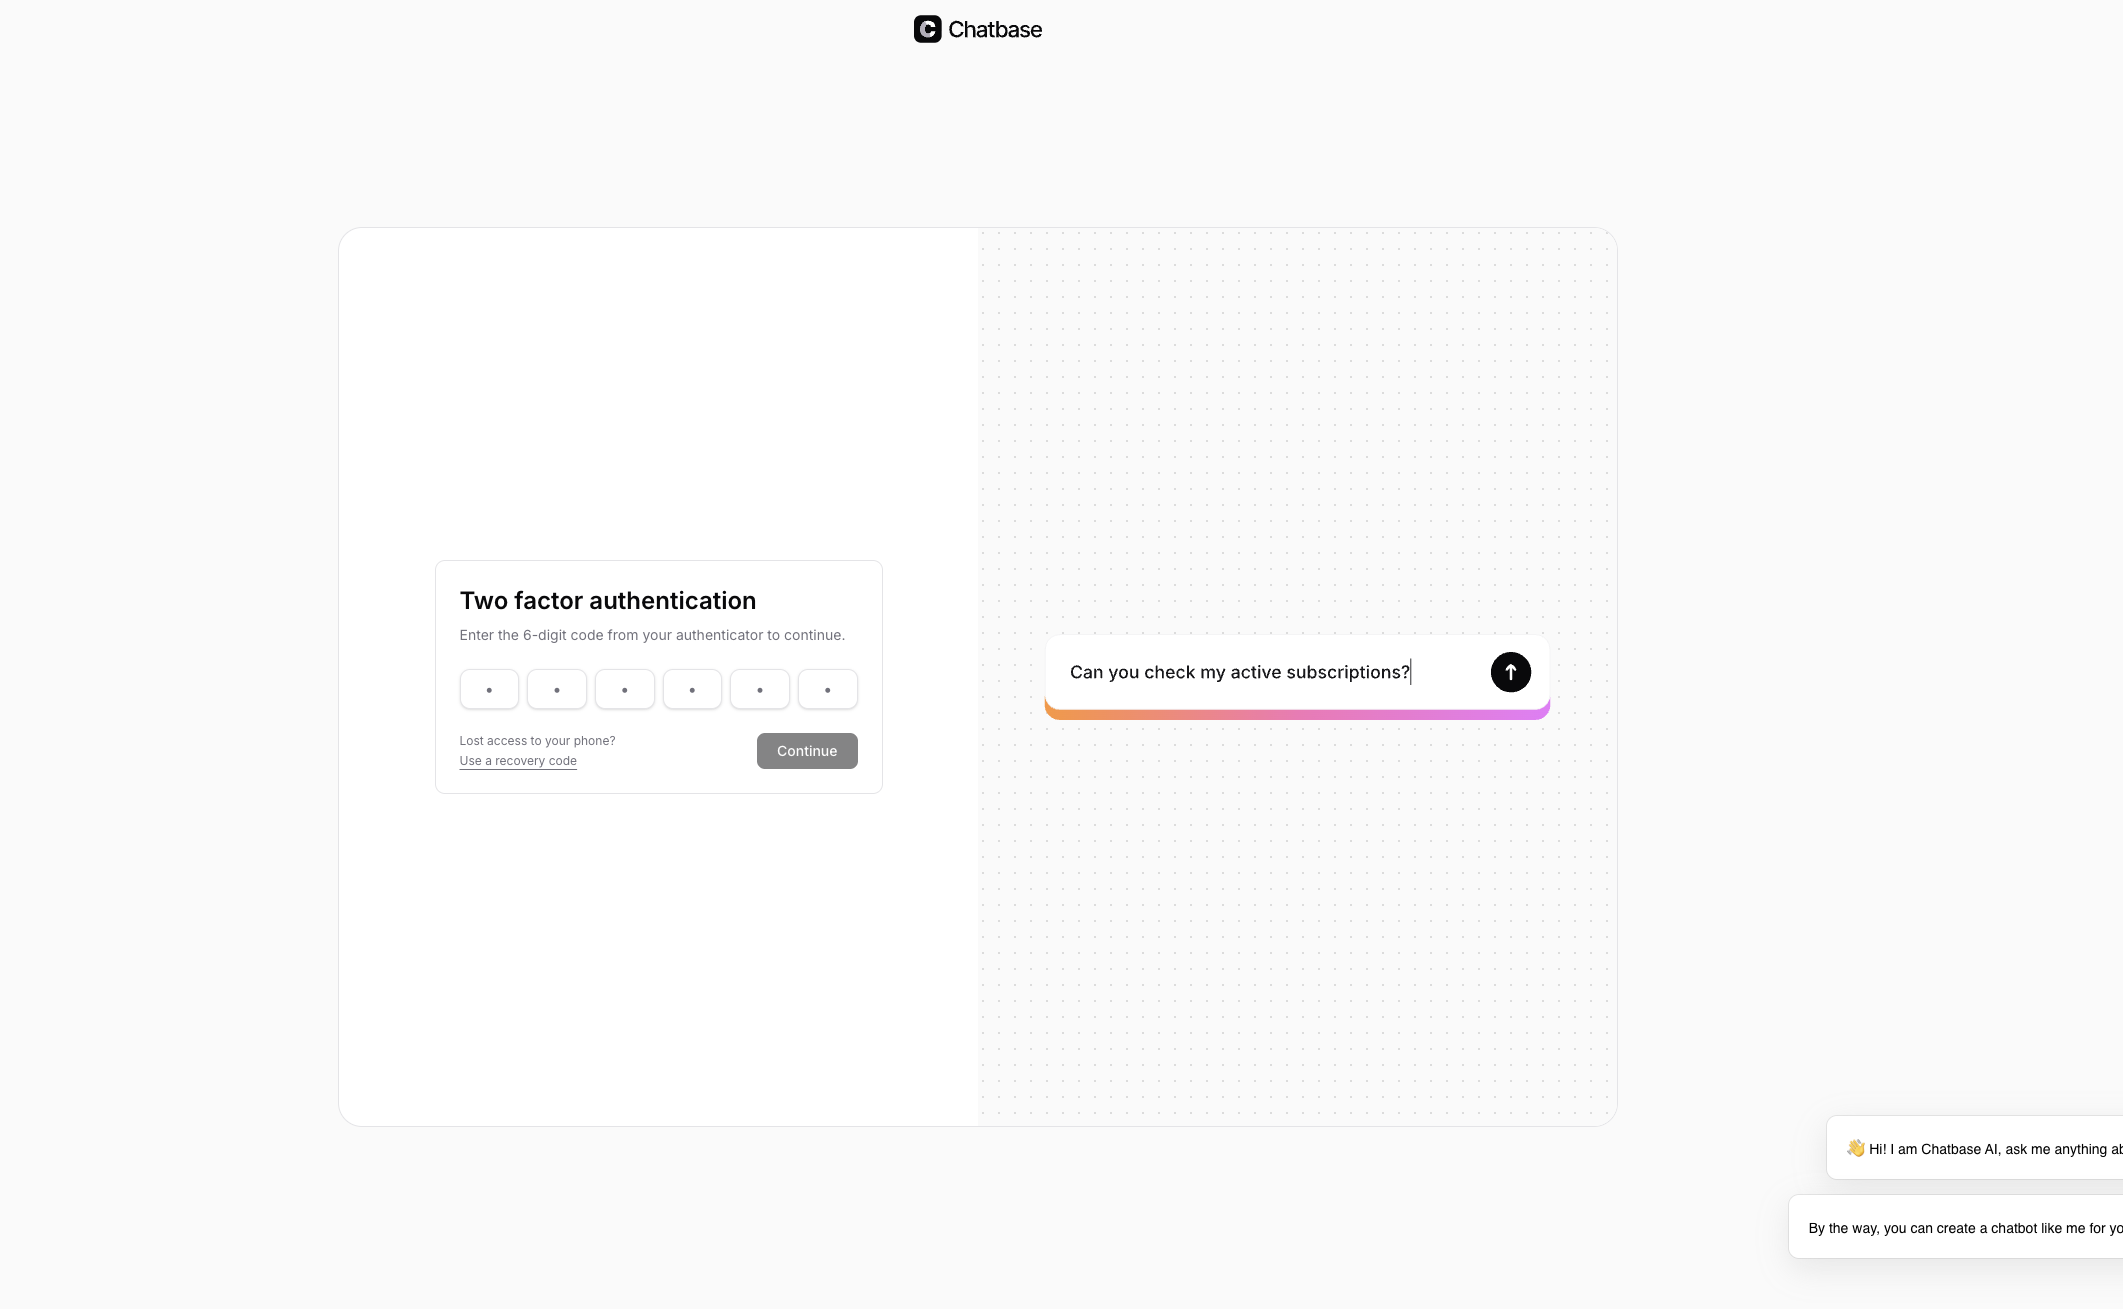
If you close or navigate away from the 2FA challenge page without completing it, Chatbase signs you out to protect your session.
Change email or 2FA settings
With 2FA on, Chatbase asks for a code before these actions:- Signing in
- Approving access for an app that connects to Chatbase (OAuth or MCP)
- Changing your account email
- Changing your password
- Managing or regenerating recovery codes
- Removing 2FA from your account
- A 6-digit authenticator code, or
- A recovery code
Frequently asked questions
Can a workspace Owner require 2FA for all members?
Can a workspace Owner require 2FA for all members?
No. 2FA is a personal account setting, and there’s no workspace setting that makes it mandatory. Ask each member to turn it on from Account settings > Two step verification.
Can an Owner reset a member's 2FA?
Can an Owner reset a member's 2FA?
No. Only the signed-in user can remove 2FA from their own account. Nothing in workspace member management changes another user’s 2FA.
Does 2FA work with Google sign-in?
Does 2FA work with Google sign-in?
Yes. If 2FA is on, you’re asked for a code after signing in with Google, the same as with email and password.
Does Chatbase support SMS codes or passkeys for 2FA?
Does Chatbase support SMS codes or passkeys for 2FA?
No. The only method is an authenticator app (TOTP). Use any app that supports TOTP, such as Google Authenticator, 1Password, or Authy.
How many recovery codes do I get?
How many recovery codes do I get?
8 codes of 8 characters each. They’re generated automatically when you finish setup. Each works once, and generating a new set replaces all old codes.
Does 2FA affect my API keys?
Does 2FA affect my API keys?
API requests are authenticated with your API key rather than a signed-in session, so turning on 2FA shouldn’t change how existing API integrations work.
Related
Manage
Workspace roles, owners, and members.
HIPAA compliance
Safeguards and responsibilities on HIPAA workspaces.