

What you can do:
Put your AI agent in front of every visitor to your Wix site, answering questions without them leaving the page.
Before you start
- A Chatbase account with an AI agent. If you haven’t built one yet, sign up and start a 7-day free trial and follow Your first AI agent.
- A Wix website you can edit.
How to embed your AI agent
1
Copy your embed code
- Navigate to your dashboard and select the AI agent you wish to embed.
- Click Channels in the left sidebar, then click Manage on the Chat Bubble card (or Setup, if you haven’t configured it yet).
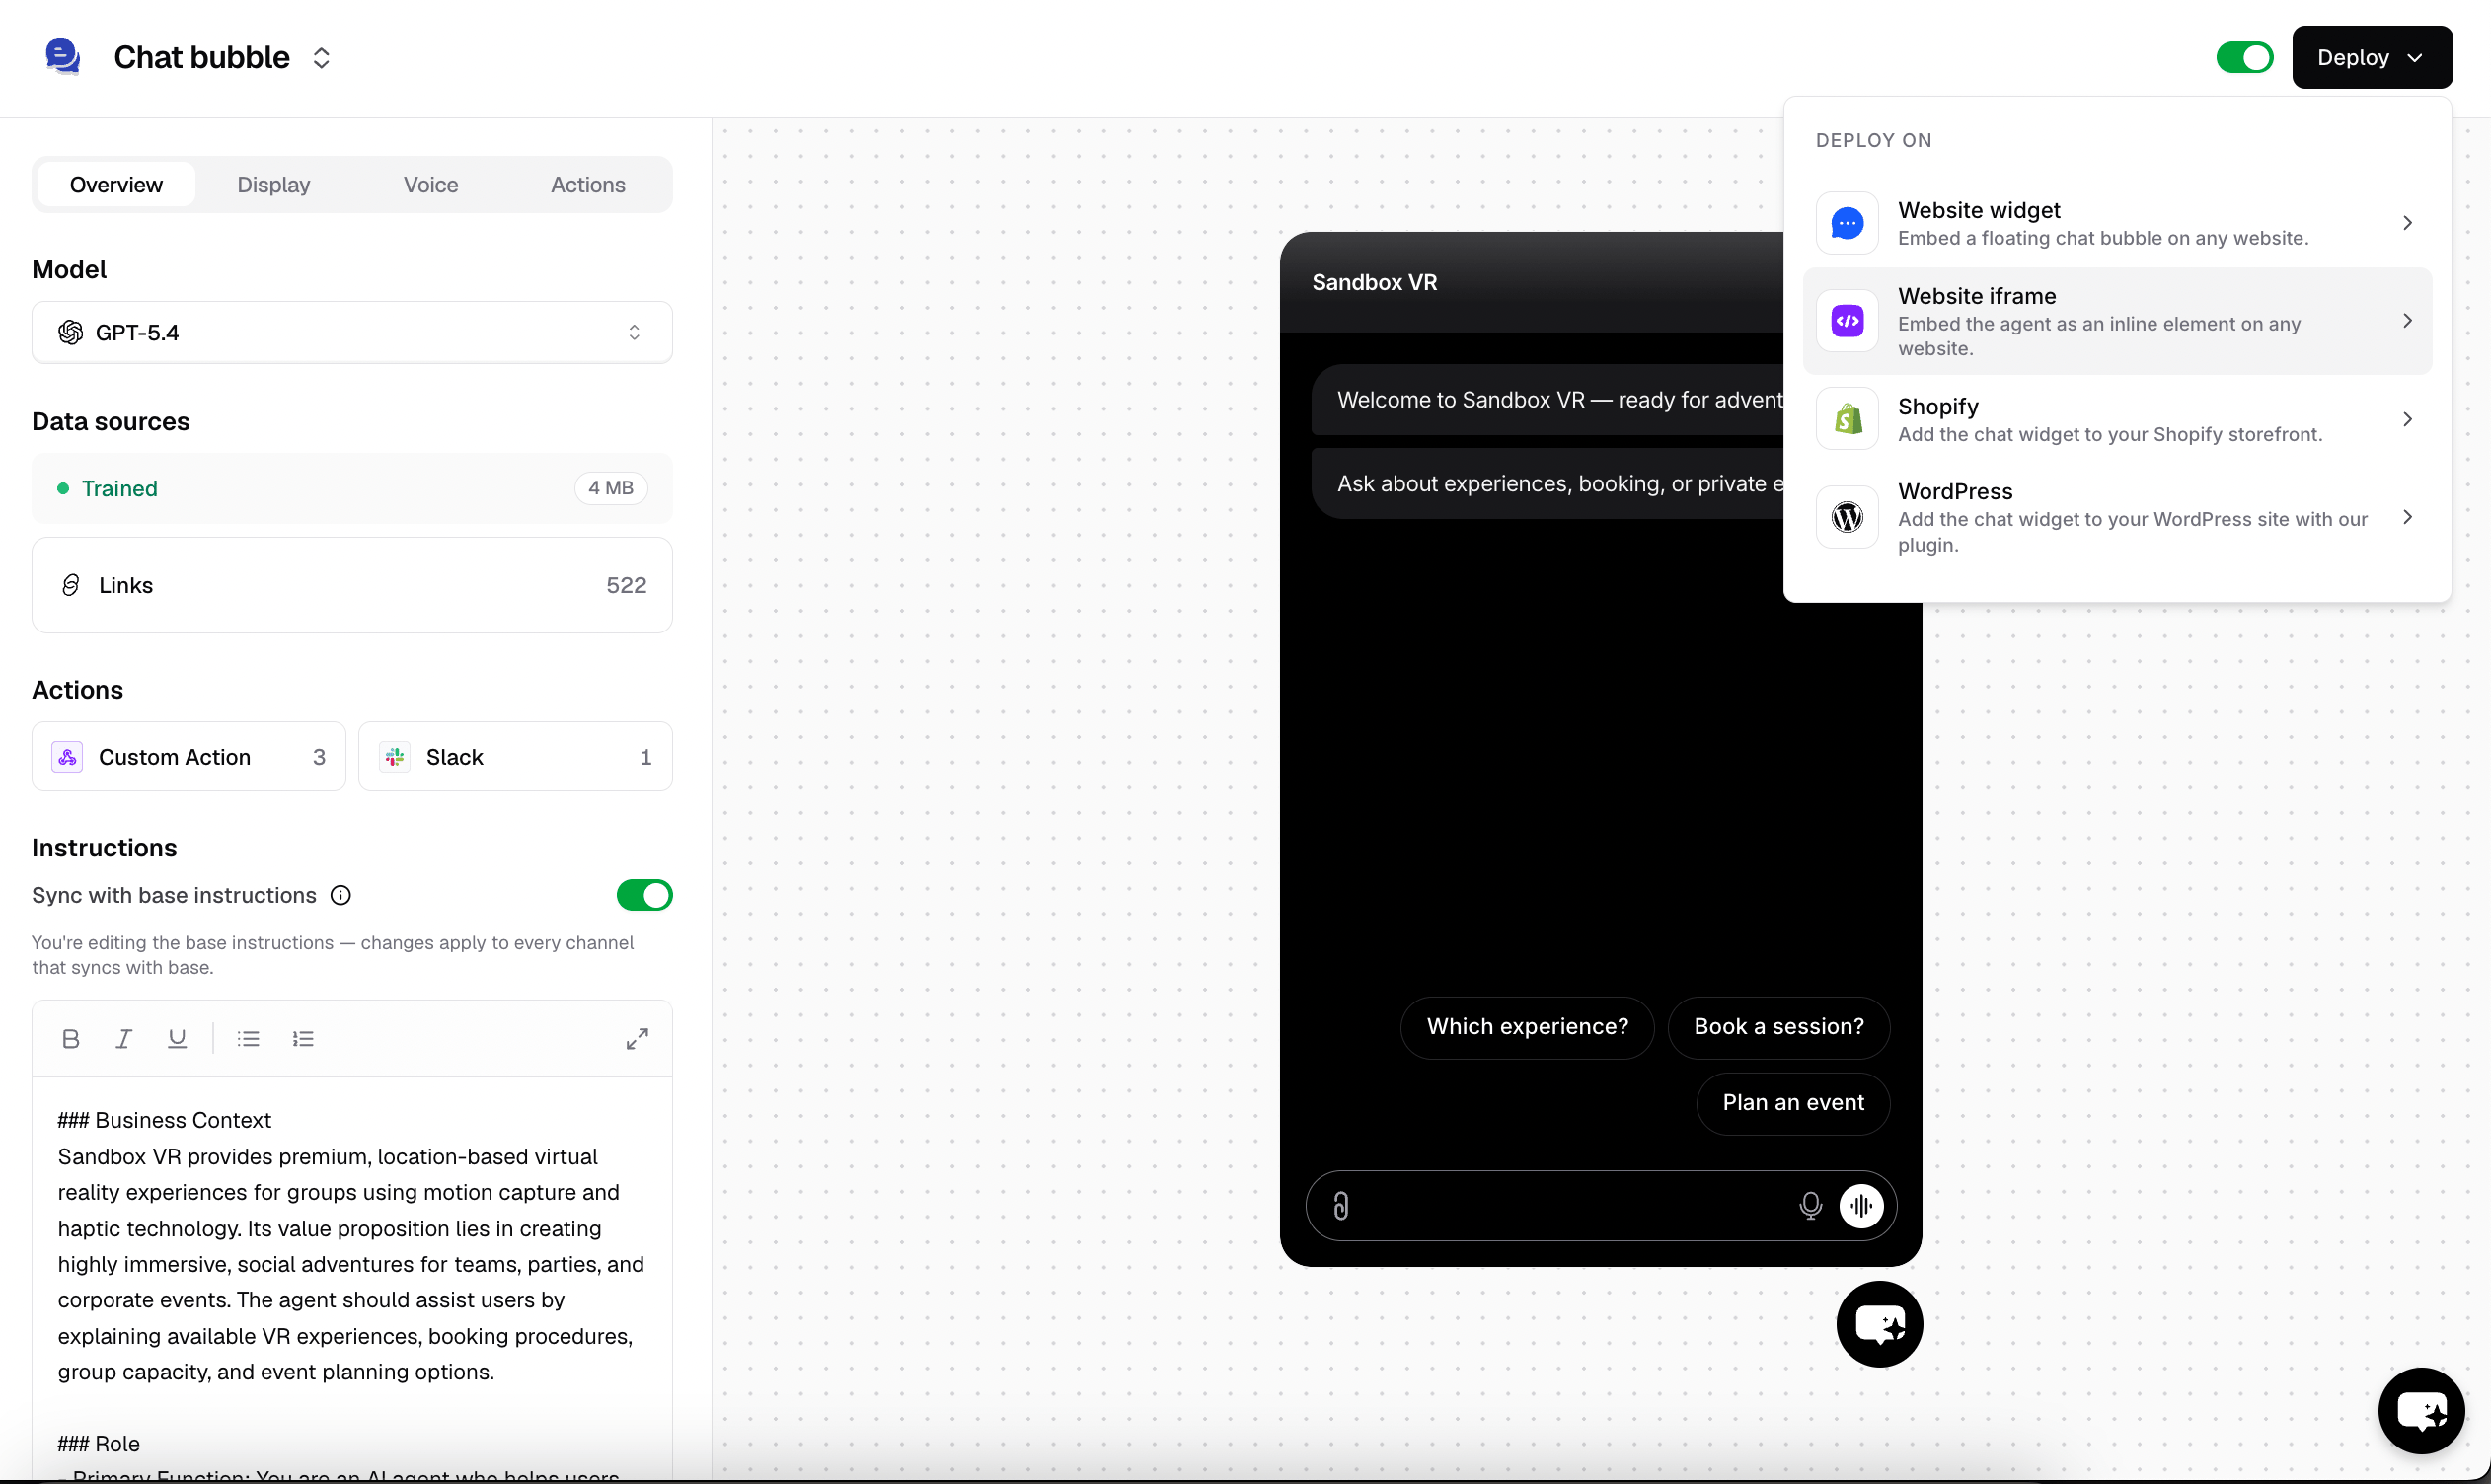
- Click Deploy and select the Website widget embed type. Scroll down and click Copy to copy the provided script.
2
Open your Wix site editor
Sign in to Wix and head to your dashboard. Click Design Site in the top-right corner of the page to load your site in the Wix editor.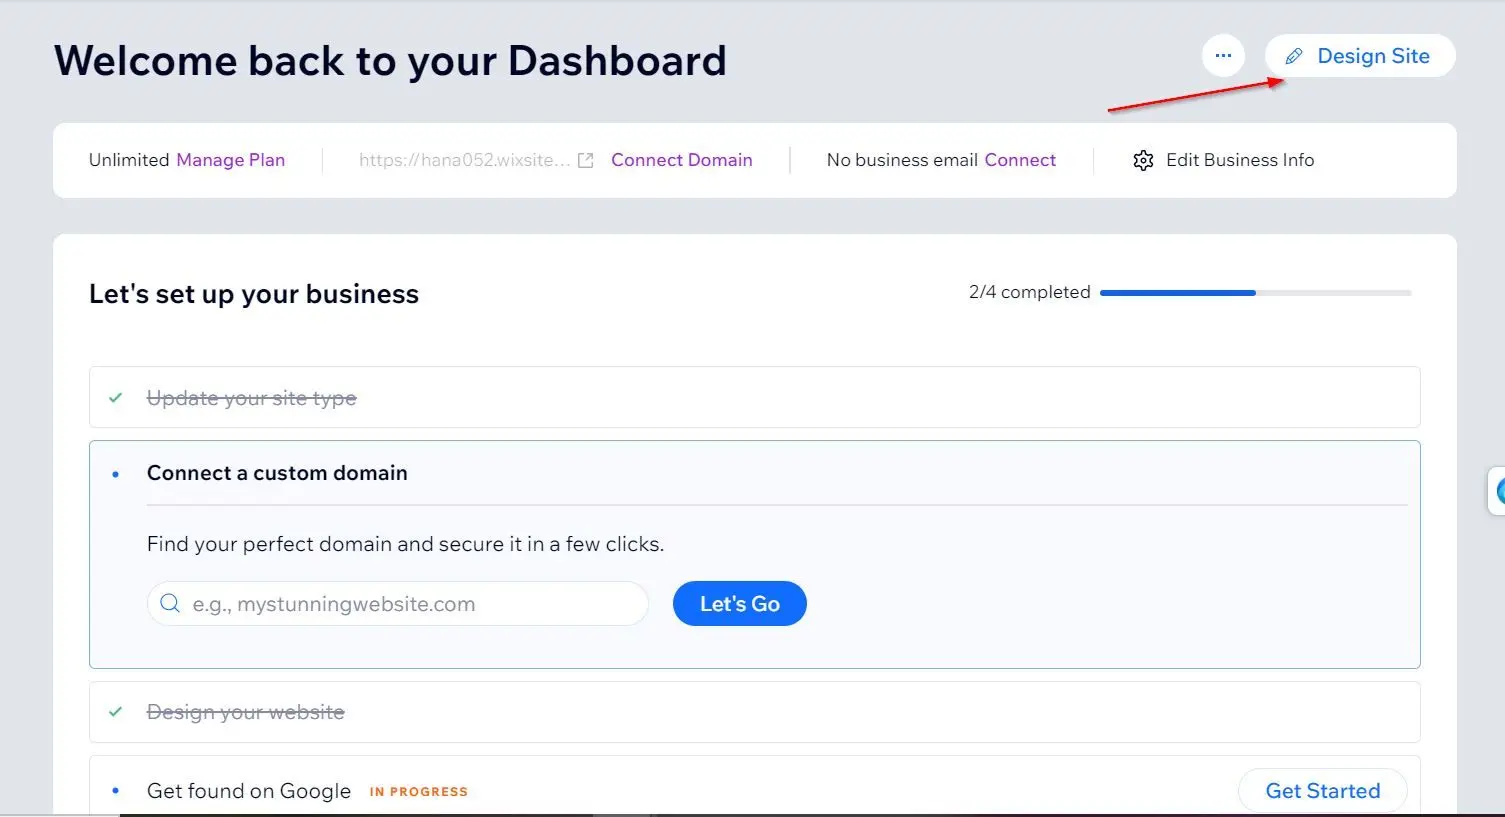
3
Add the Custom Code element
Scroll to the section of the website where you want the AI agent, then click the big plus (Add Elements) button on the left sidebar.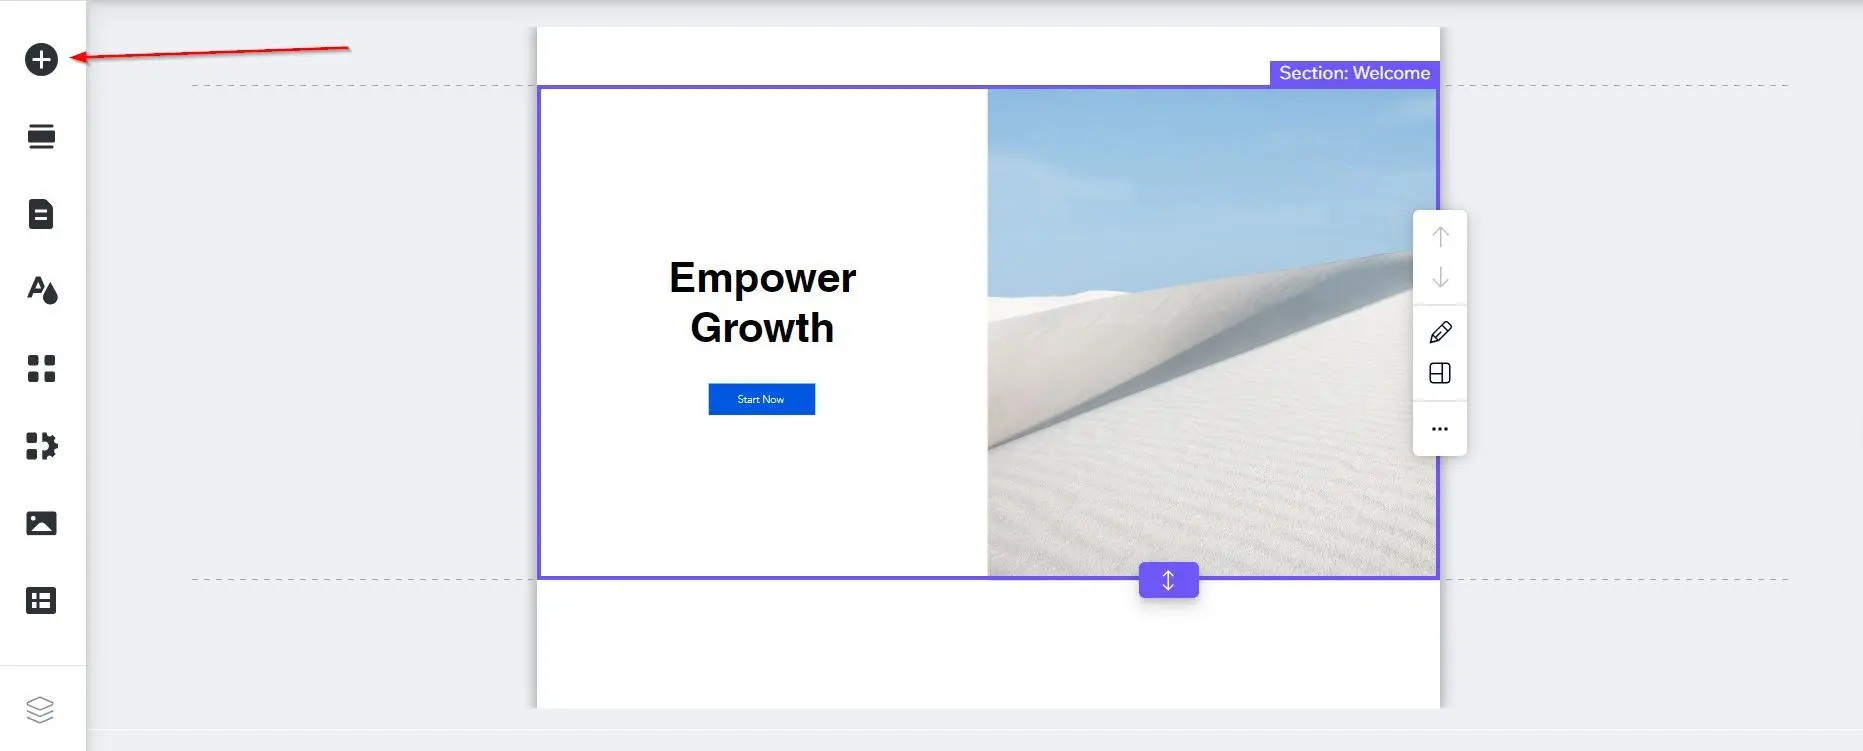
4
Paste the embed code
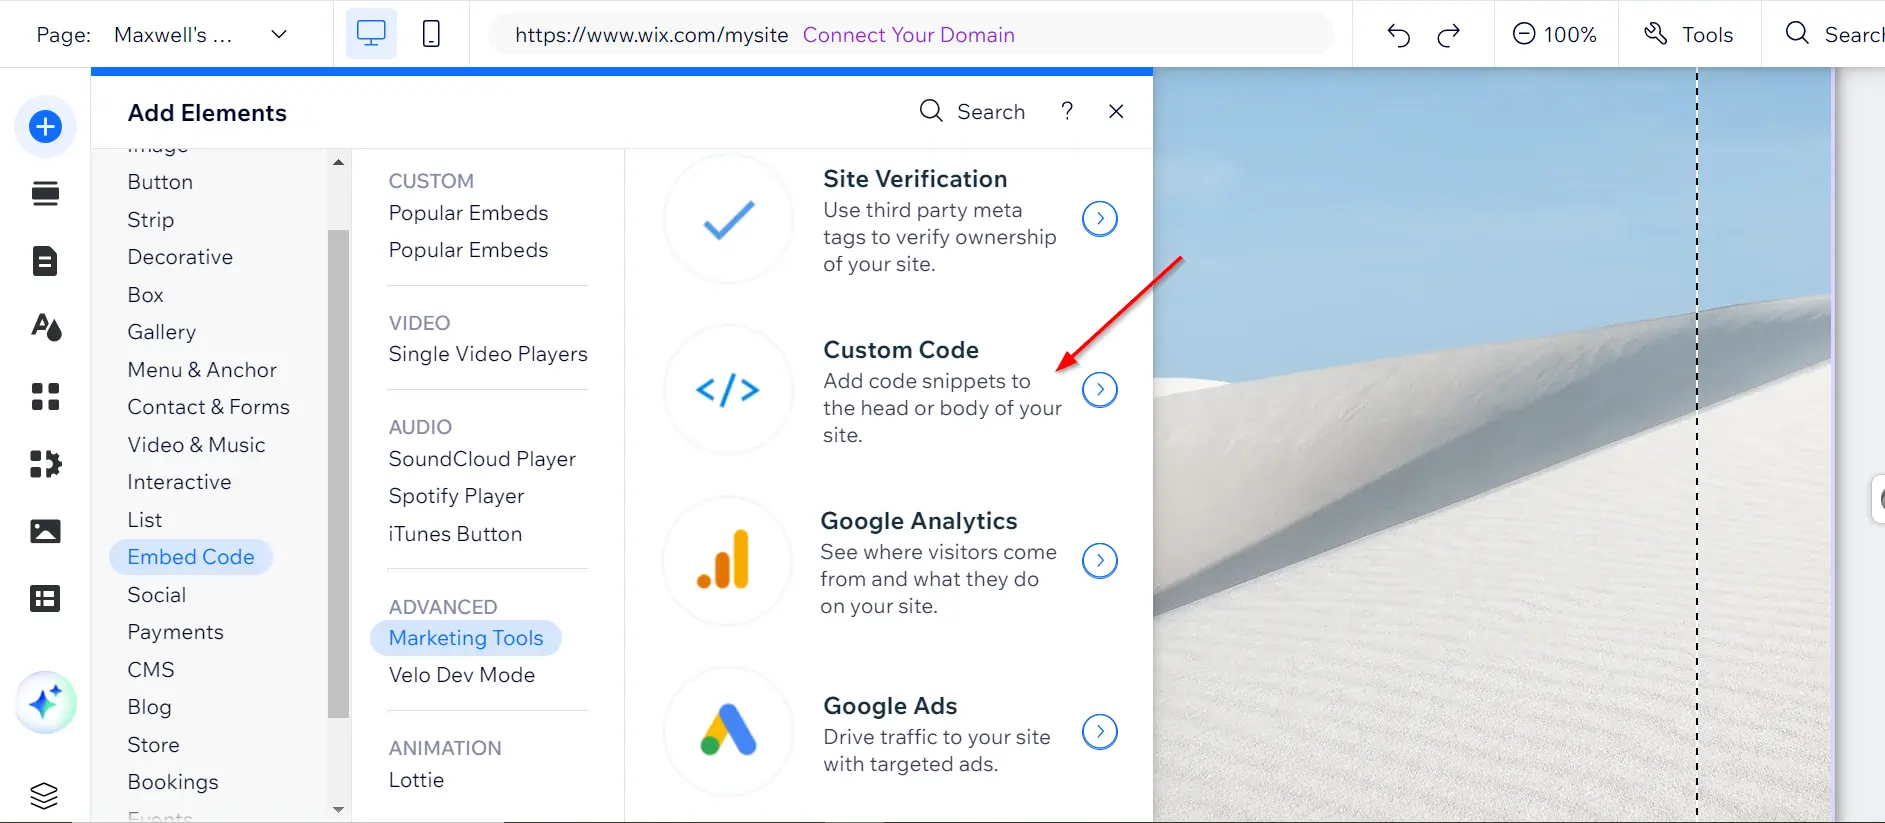
When the custom code widget pops up, click + Add Custom Code in the top right, then:
- Paste the code snippet into the custom code editor.
- Provide a name for your code.
- Choose an option under Add Code to Pages. Chatbase recommends loading the script on every page, so pick the option for all pages, such as All pages. To show the AI agent on some pages only, choose just those pages.
- Choose where to place your code under Place Code in. The script belongs before the closing
</body>tag, so pick the end of the body, such as Body - end. - Click Apply.
Preview your website and confirm the floating Chatbase chat icon appears.
Allow your Wix address
If you turned on Only allow embedding the agent on specific domains in the Specific domains card of the Deploy sheet, list every address your Wix site runs on. For example (example values):https://jane.wixsite.com covers every site under that address. Each entry matches one exact host, and an entry without https:// or http:// matches only https pages. Don’t use https://*.wixsite.com: it would let every Wix site embed your AI agent. See Deploy button.
Troubleshooting
The Chat Bubble doesn't appear on my published site
The Chat Bubble doesn't appear on my published site
Possible causes:
- Specific domains is on and the address you’re visiting isn’t listed. The browser console shows a message starting with
[Chatbase] Agentthat says the agent is not allowed on that origin. - The visitor’s country is in your blocked countries.
- Show to a percentage of visitors is on under Display > A/B testing, and this visitor isn’t in the sample.
- The script was added with an Embed element on the page instead of through Custom Code. If Wix runs that element in its own frame, the bubble is clipped to the element’s box.
The Chat Bubble shows on desktop but not on mobile
The Chat Bubble shows on desktop but not on mobile
Chatbase’s standard settings don’t hide the Chat Bubble on mobile. The Display settings for mobile only change whether the chat opens on its own and whether floating messages show, not the bubble itself. Check that the custom code is set to load on the pages you’re viewing on your phone, and check the causes above.
You can customize the appearance and colors of your AI agent on your Chatbase dashboard. Go to your dashboard, choose an AI agent, click Channels in the left sidebar, click Manage on the Chat Bubble card, then open the Display tab to edit Content, Capabilities, Colors, Floating bubble, and Localization.
Frequently asked questions
Which Custom Code options should I pick in Wix?
Which Custom Code options should I pick in Wix?
Load the code on all pages and place it at the end of the body. That matches Chatbase’s instructions to add the script before the closing
</body> tag on every page.Can I put the AI agent on only one Wix page?
Can I put the AI agent on only one Wix page?
Yes. Under Add Code to Pages, choose only the pages where the Chat Bubble should appear.
Why does the chat fill the whole screen on my phone?
Why does the chat fill the whole screen on my phone?
That’s by design. On screens narrower than 640px, the chat opens full screen and the page behind it stops scrolling until the visitor closes it.
Can I move the Chat Bubble to the left side?
Can I move the Chat Bubble to the left side?
Yes. Set Position to Left in Display > Floating bubble. Left or right is the only position option; there is no offset. See Floating bubble.
Next steps
Customize the Chat Bubble
Match the widget to your brand colors, position, and copy.