

What you can do:
Put your AI agent in front of every visitor to your WordPress site, with no theme code to edit.
Before you start
- A Chatbase account with an AI agent, and the AI agent enabled. If you don’t have an account, sign up and start a 7-day free trial; if you’re not sure how to build an AI agent, see Your first AI agent.
- A WordPress site where you can install plugins, and access to your admin dashboard.
How to add your AI agent
1
Log in to your WordPress admin dashboard
Your dashboard URL is typically yourdomainname.com/wp-admin/. You can also reach it through your web hosting control panel.
2
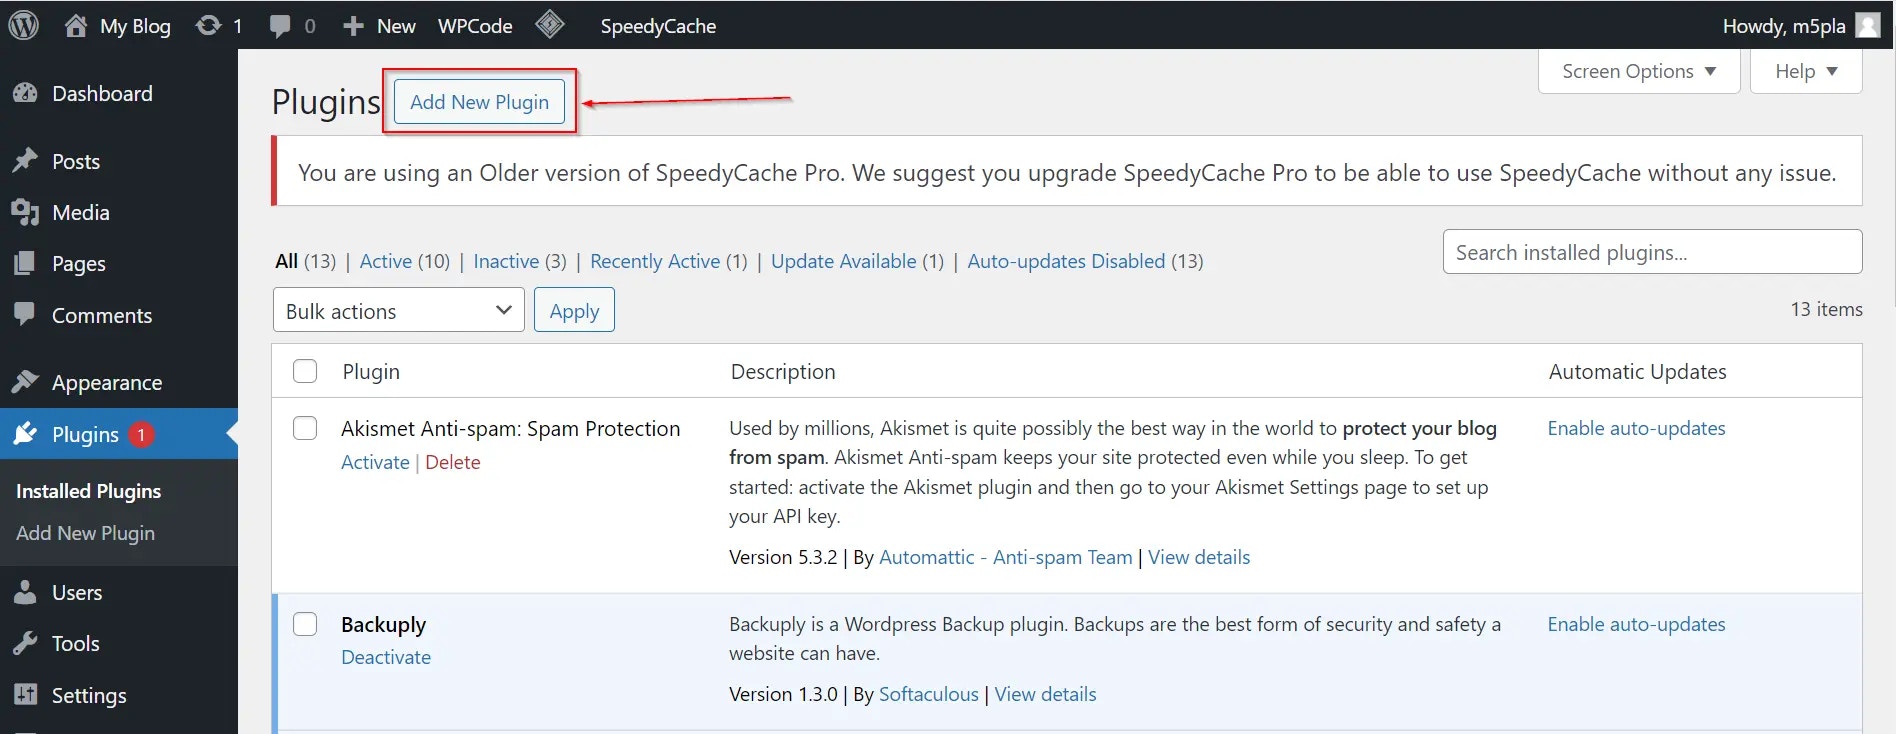
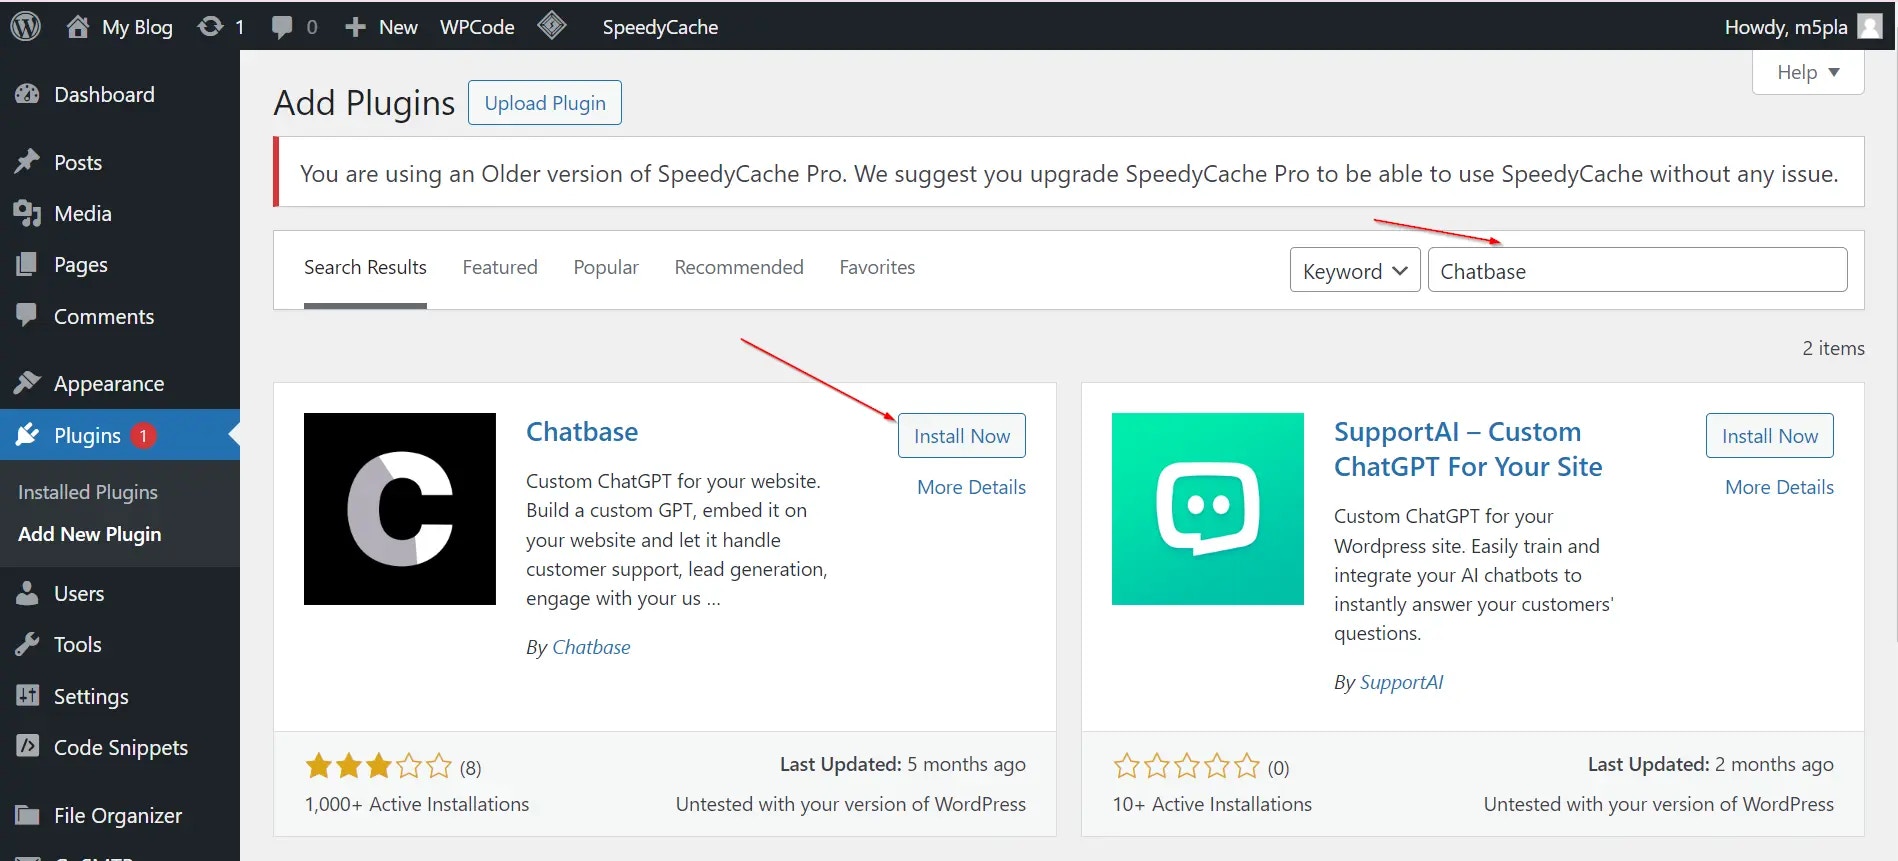
Install and activate the Chatbase plugin
In the left sidebar of your WordPress admin dashboard, click Plugins.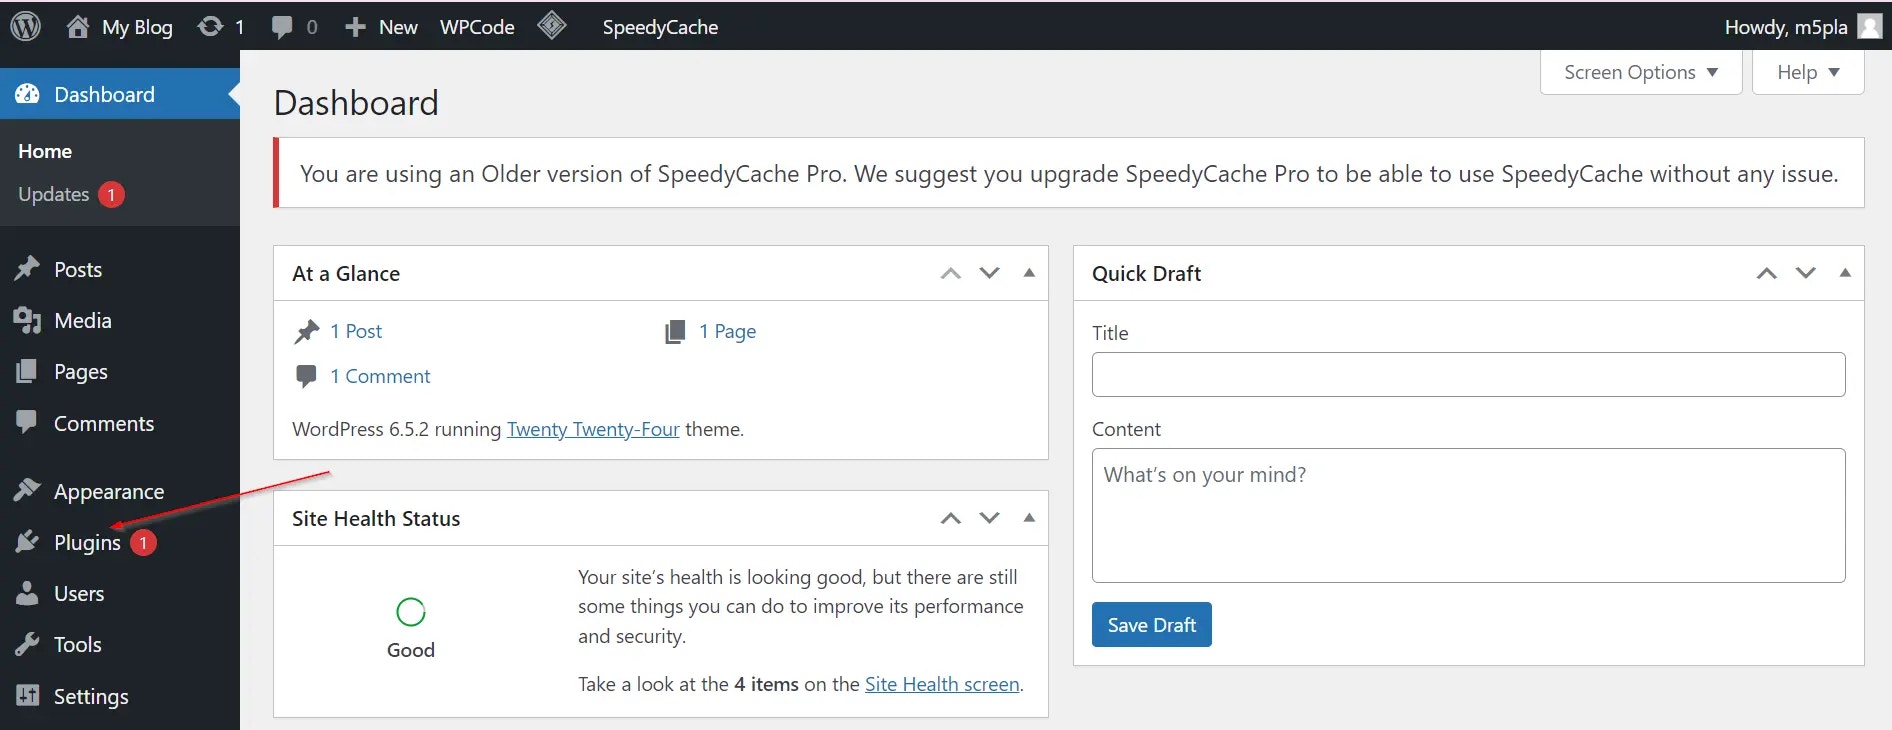
3
Open the Chatbase plugin settings
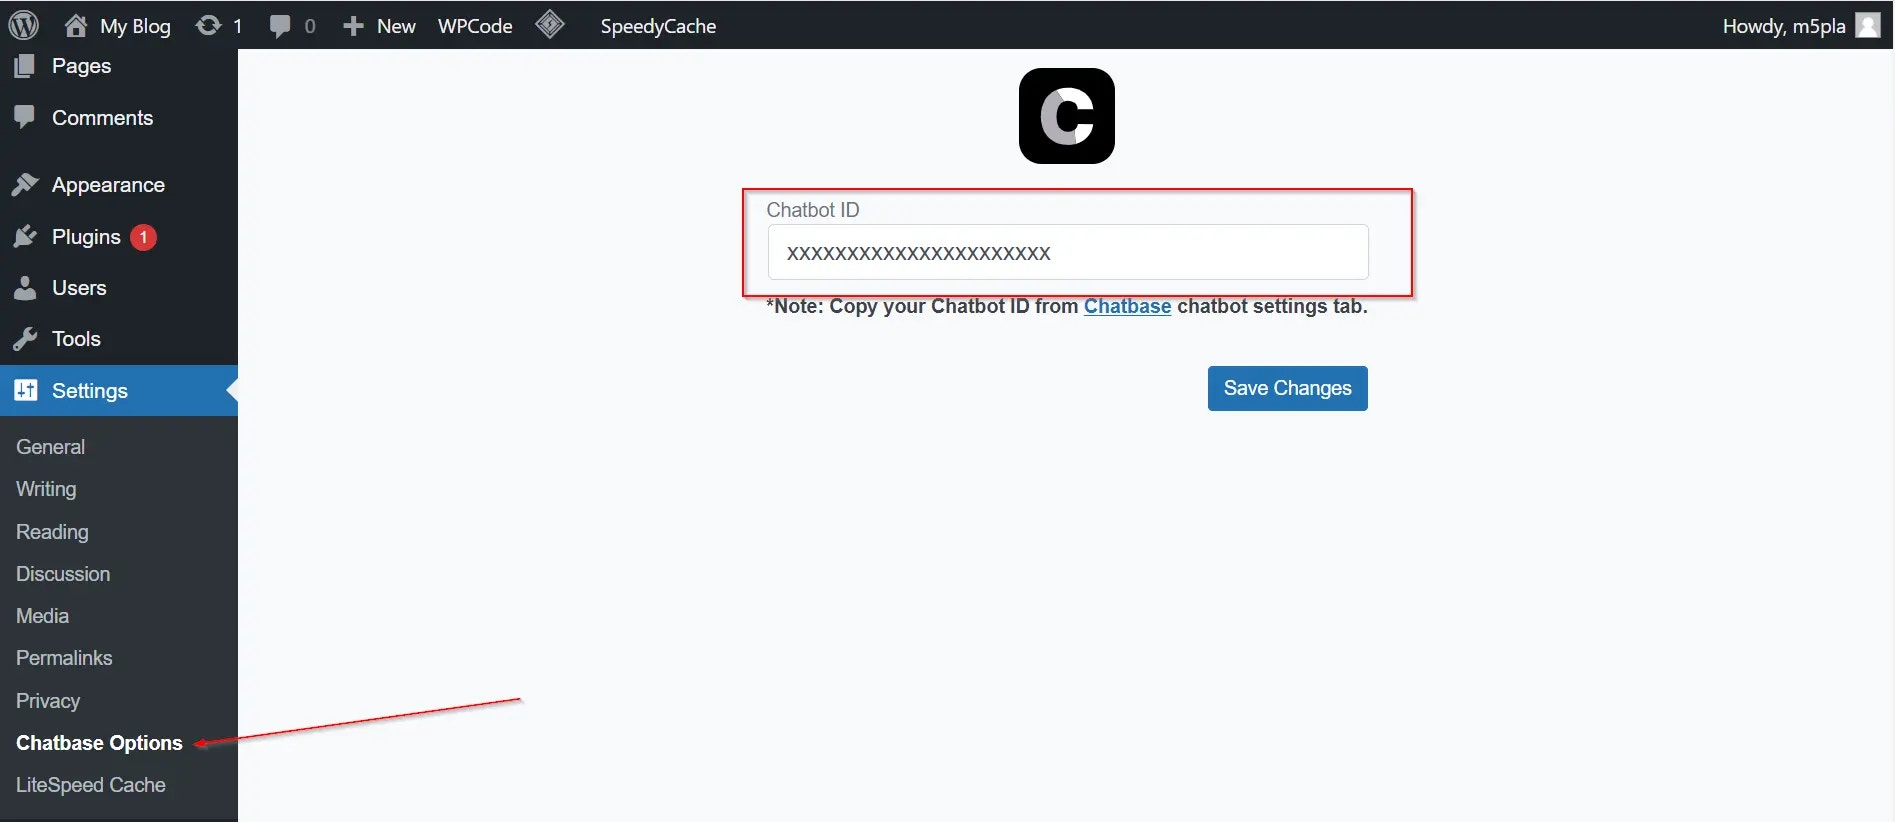
- In the left sidebar of the WordPress admin dashboard, click Settings.
- Look for Chatbase options and click it.
- Find the text box labeled Agent ID.
4
Copy and paste your Agent ID
- Go to your Chatbase dashboard and select the AI agent you want to embed.
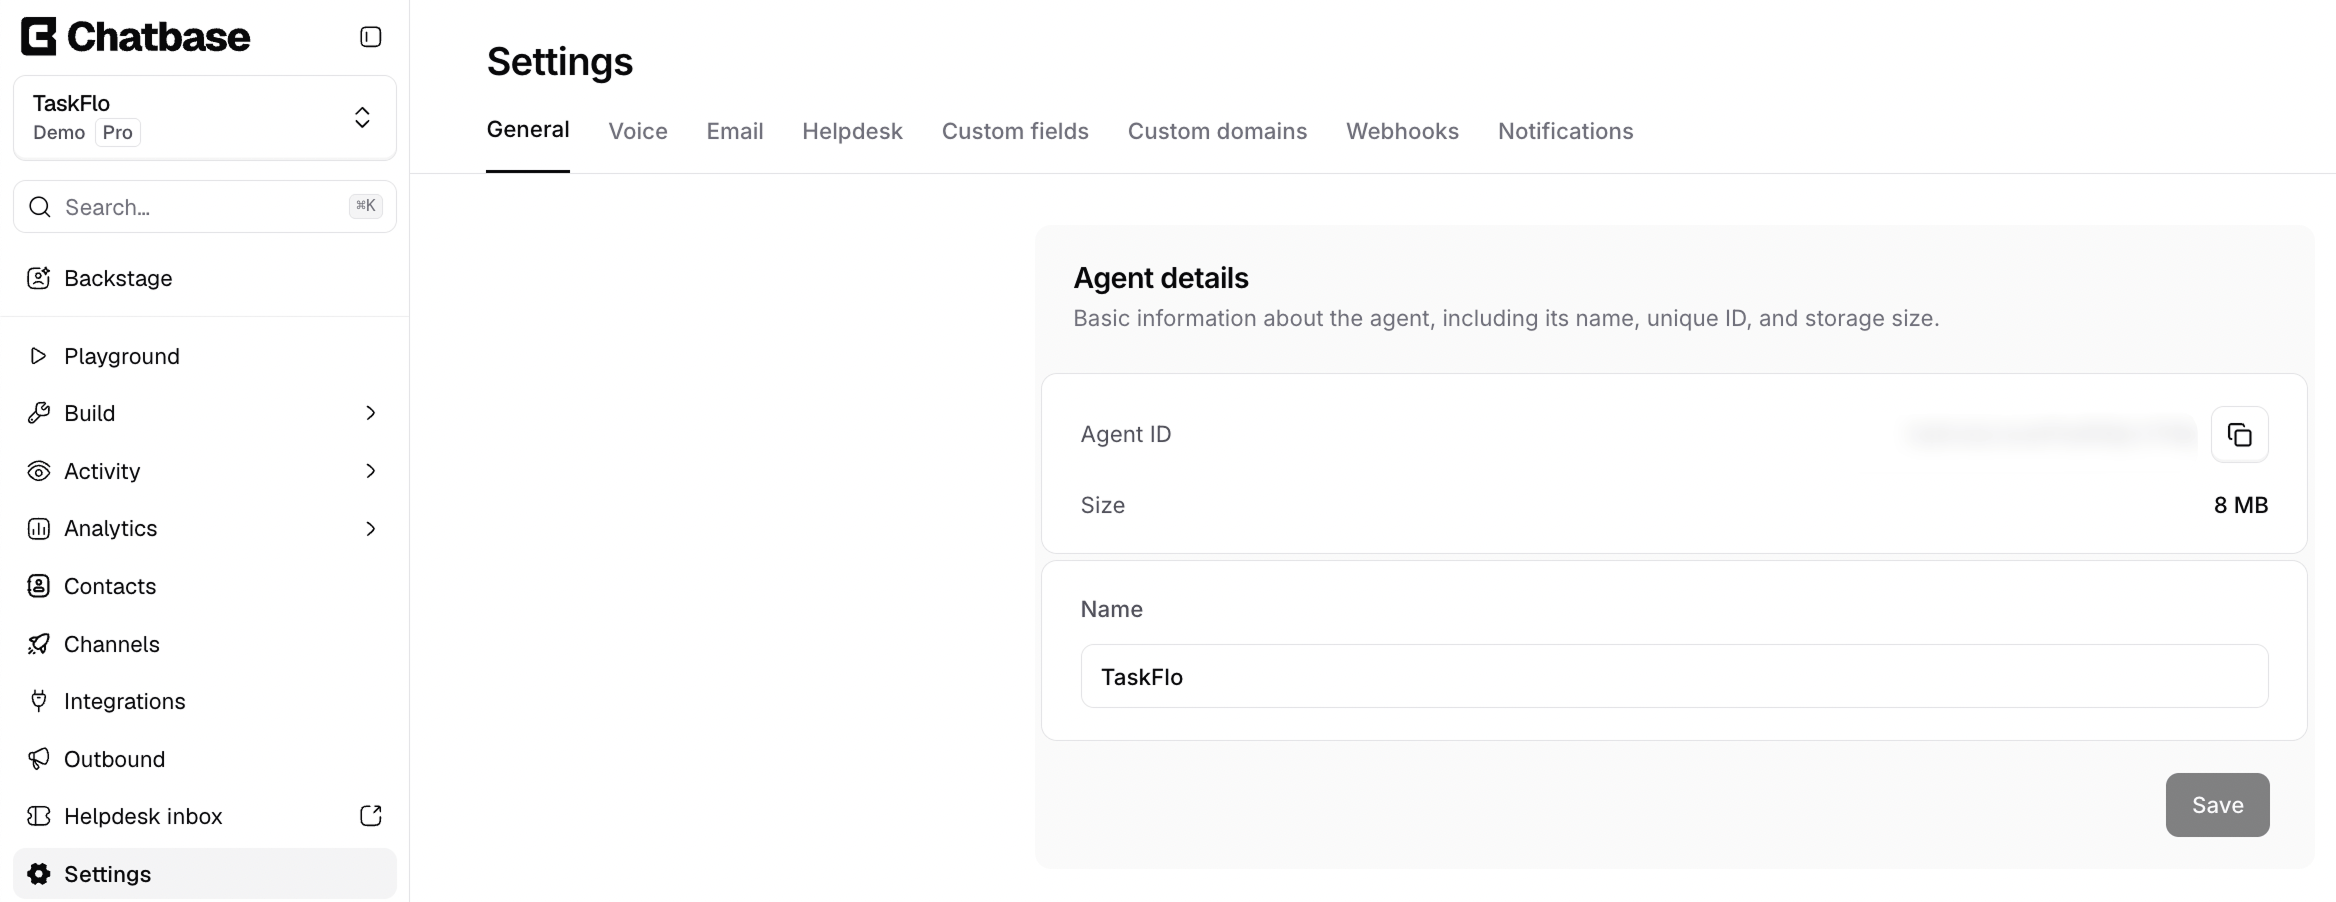
- Click Settings in the sidebar and stay on the General tab. Copy the Agent ID from the Agent details card.
- Paste the Agent ID into the text box in your WordPress settings.
5
Save your changes
Click Save Changes.
Visit your WordPress site and confirm the Chatbase AI agent appears and responds.

If you use Specific domains
If you turned on Only allow embedding the agent on specific domains in the Specific domains card of the Deploy sheet, add every address your WordPress site runs on, such ashttps://www.acme.com and a staging address like https://staging.acme.com (example values). Each entry matches one exact host, paths are ignored, and an entry without https:// or http:// matches only https pages. For a local install, add the full address with its port, such as http://localhost:8080. See Deploy button.
Troubleshooting
The Chat Bubble doesn't appear after saving the Agent ID
The Chat Bubble doesn't appear after saving the Agent ID
Possible causes:
- A caching or optimization plugin (for example, one that delays, defers, combines, or self-hosts JavaScript) changed how the Chatbase script loads.
- Specific domains is on and the site’s address isn’t listed. The browser console shows a message starting with
[Chatbase] Agentthat says the agent is not allowed on that origin. - The visitor’s country is in your blocked countries.
My caching plugin breaks the Chat Bubble
My caching plugin breaks the Chat Bubble
The Chat Bubble loads from a short inline script that fetches
embed.min.js from chatbase.co after the page loads, and it works out where to open the chat from that file’s address. If your caching plugin optimizes JavaScript, exclude the Chatbase inline script and chatbase.co/embed.min.js from its delay, defer, combine, minify, and “host scripts locally” features. A copy of embed.min.js served from your own domain won’t load the chat correctly.You can customize the appearance and colors of your AI agent on your Chatbase dashboard. Go to your dashboard, choose an AI agent, click Channels in the left sidebar, click Manage on the Chat Bubble card, then open the Display tab to edit Content, Capabilities, Colors, Floating bubble, and Localization.
Frequently asked questions
Is the Chatbase WordPress plugin free?
Is the Chatbase WordPress plugin free?
Yes. The plugin is free to install, and the WordPress channel is part of every Chatbase plan. To hide “Powered by Chatbase” in the chat, add the Remove ‘Powered By Chatbase’ add-on, see Add Ons.
Can I add Chatbase to WordPress without the plugin?
Can I add Chatbase to WordPress without the plugin?
Yes. Copy the Website widget script from Deploy in your Chatbase dashboard and output it unchanged in your site footer on every page, for example with a code snippets plugin such as WPCode or in your theme’s footer template. Chatbase doesn’t depend on how the script reaches the page.
Can I show the Chat Bubble on some pages only?
Can I show the Chat Bubble on some pages only?
Instead of the plugin, add the Website widget script only to the pages where the Chat Bubble should appear.
What does the Chat Bubble look like on phones?
What does the Chat Bubble look like on phones?
Below 640px wide, the chat opens full screen and the page behind it stops scrolling while it’s open. On wider screens it opens as a panel 406px wide in the bottom corner.
Can I change where the Chat Bubble sits?
Can I change where the Chat Bubble sits?
Switch it between the bottom left and bottom right with Position in Display > Floating bubble. There is no offset setting. See Floating bubble.
Next steps
Customize the Chat Bubble
Match the widget to your brand colors, position, and copy.