

What you can do:
Give shoppers a single place to find a product, add it to the cart, check out, and ask where their order is, without leaving the chat.
What your AI agent can do for your store
You choose what the AI agent can do by turning on Shopify Actions. Before the purchase
After the purchase
No Shopify Action cancels an order or changes the shipping address on a placed order. Send those requests to your team with Escalations. See Limitations.
Example: from product question to order tracking
- A shopper on your storefront opens the Chat Bubble and asks, “Do you have a waterproof jacket under $100?” The AI agent uses Retrieve and display products and shows matching jackets with Add to cart buttons.
- The shopper says, “Add the black one in medium.” The AI agent uses Update cart, then asks whether they want to add more or place the order.
- The shopper says, “Check out.” The AI agent uses Create order and replies with a secure Shopify checkout link.
- A few days later, the same shopper asks, “Where is my order?” The AI agent uses Retrieve and display orders. If the shopper is signed in, the order is found automatically. If they’re a guest, the AI agent asks for their checkout email (or phone number) and order number first. Shipped orders show as On its way.
Before you start
- A Chatbase account with an AI agent, set to public. If you haven’t built one yet, create a free Chatbase account and follow Your first AI agent.
- A Shopify store you can install apps on.
Integration methods
You can connect your Shopify store to Chatbase in two ways:We recommend connecting via Chatbase for full access to all features and add-ons.
Method 1: Connect via Chatbase (Recommended)
This method gives you access to all Chatbase features and add-ons, and you can start a 7-day free trial.1
Find the Shopify integration
- Go to your Chatbase dashboard and select the AI agent you want to connect to Shopify.
- Open the Shopify connection flow in either of these ways. Both lead to the same store connection step below:
- Click Channels from the sidebar, then click Setup on the Shopify card.
- Or, click Integrations from the sidebar, then click Connect on the Shopify card.
2
Connect your store
-
Enter your Shopify store name, which is the subdomain of your myshopify.com URL. For example, if your store is at
mystore.myshopify.com, entermystore. You can find it in your Shopify admin under Settings > Domains.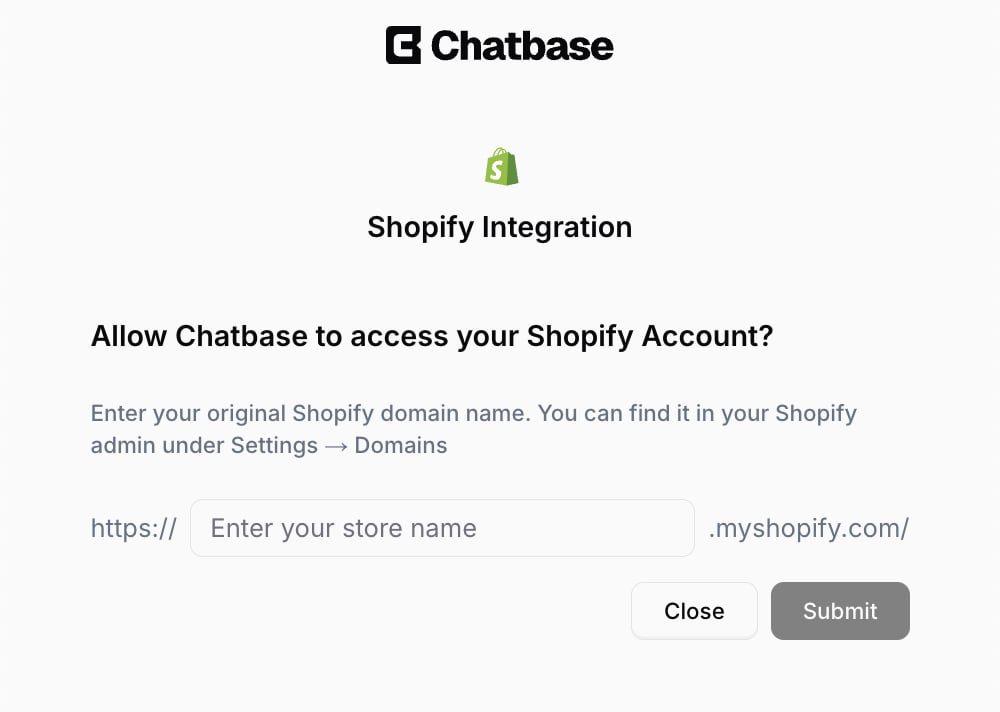
- Click Submit to start the authorization process.
- Shopify will ask you to authorize Chatbase. Review the requested permissions and click Install.
- Once authorized, you’ll be redirected back to Chatbase with a confirmation message.
3
Manage your integration
On the Channels page, click Manage on the Shopify card.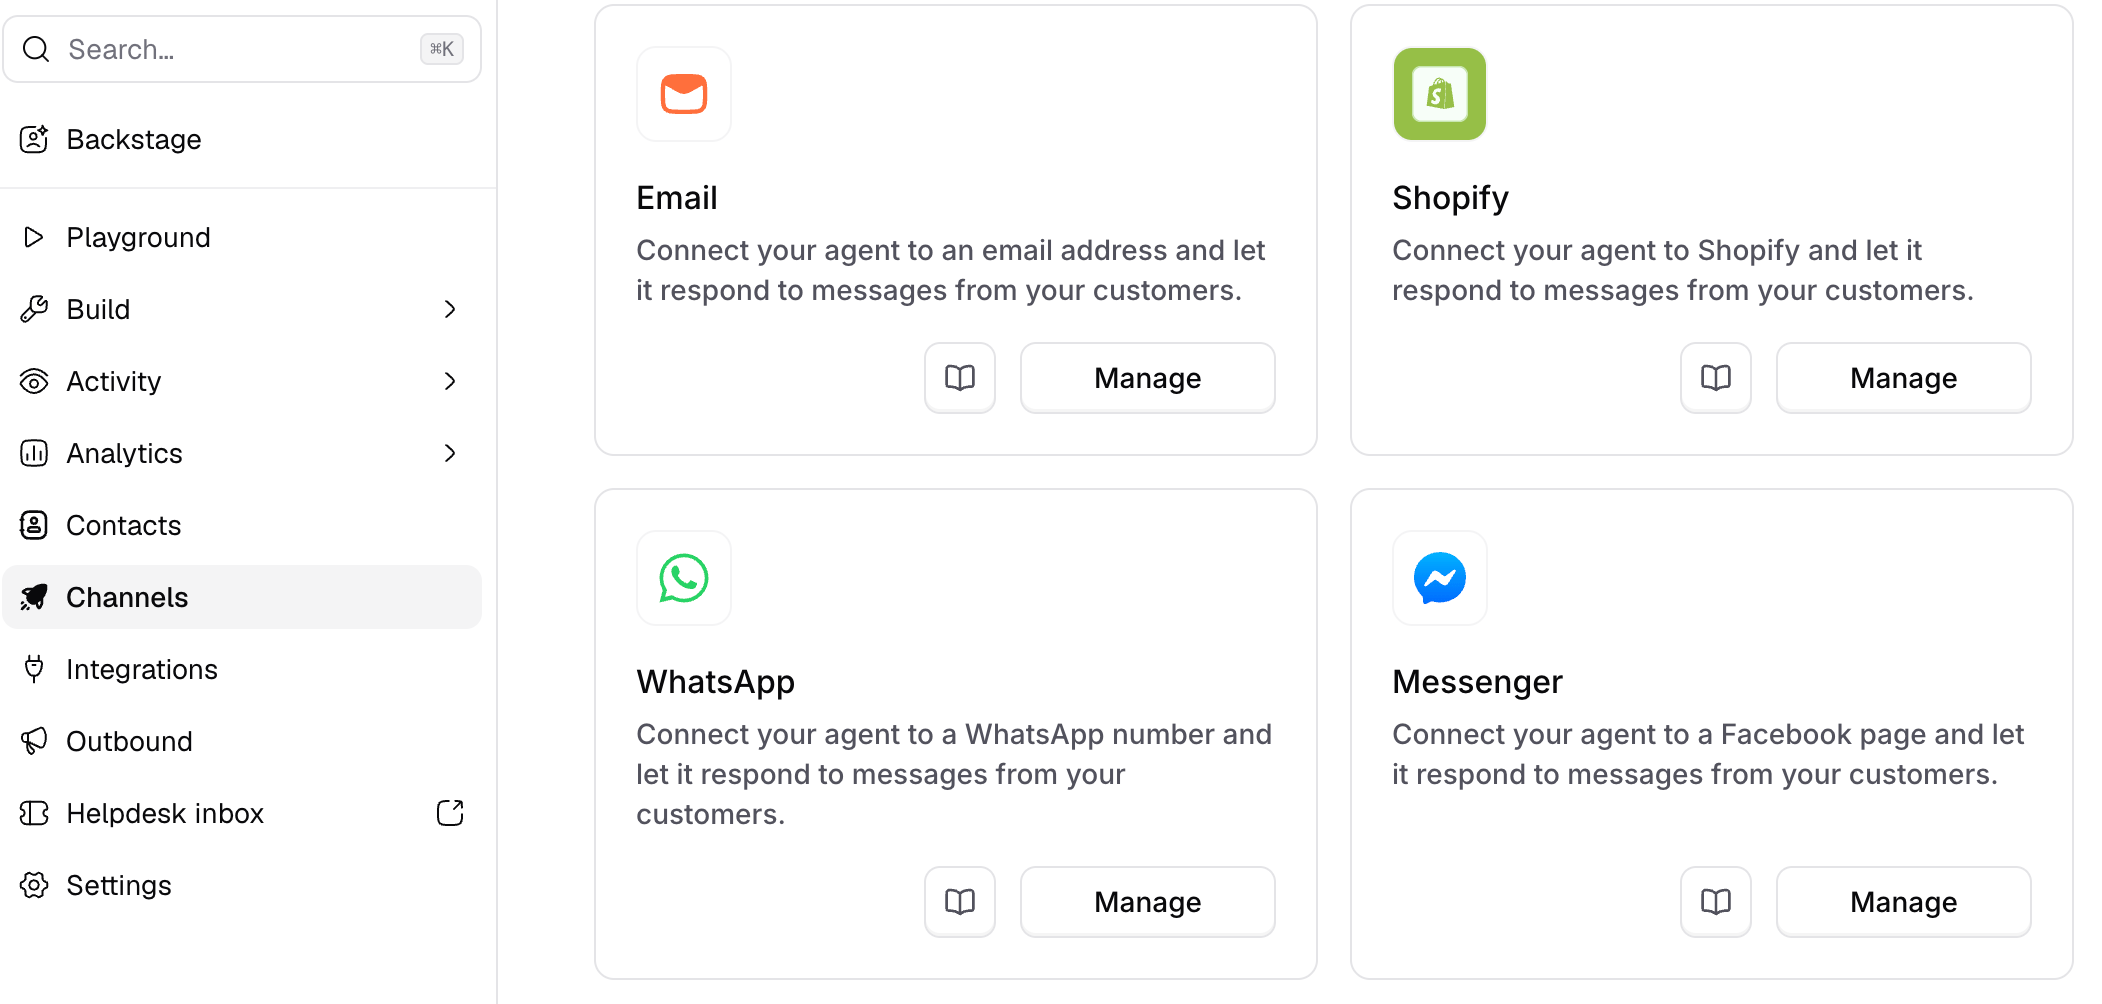
Method 2: Connect via Shopify Marketplace
Choose this method if you prefer to manage billing through Shopify. This option has limited add-ons, allows only a single AI agent, and does not include the 7-day free trial.1
Install the Chatbase app
- Go to the Chatbase app listing on the Shopify App Store.
- Click Install.
- Review the permissions Chatbase requires and click Install to approve.
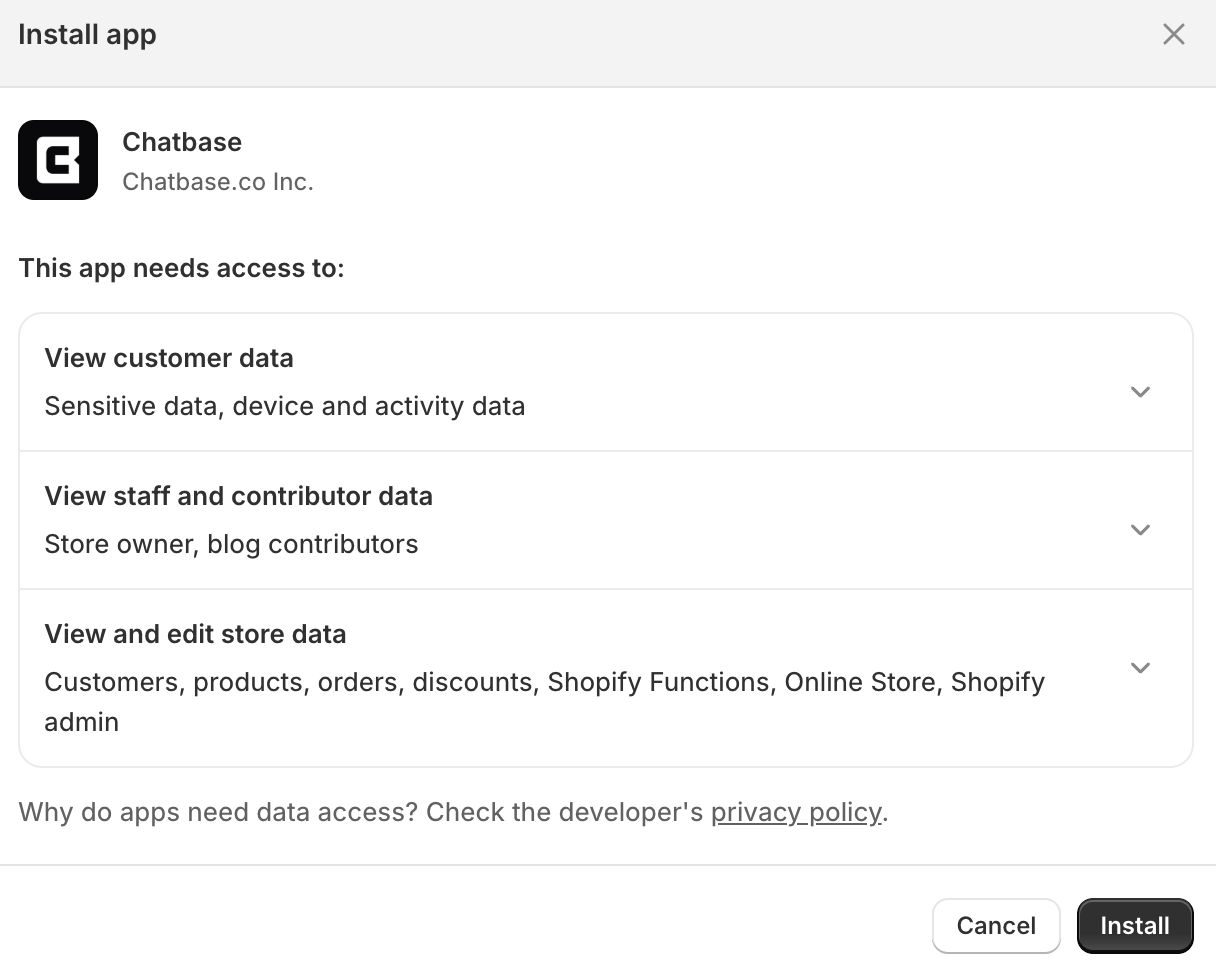
2
Complete setup
- After installation, you’ll be redirected to the Chatbase onboarding process to finish setting up your account.
- Follow the prompts to configure your AI agent.
3
Manage your integration
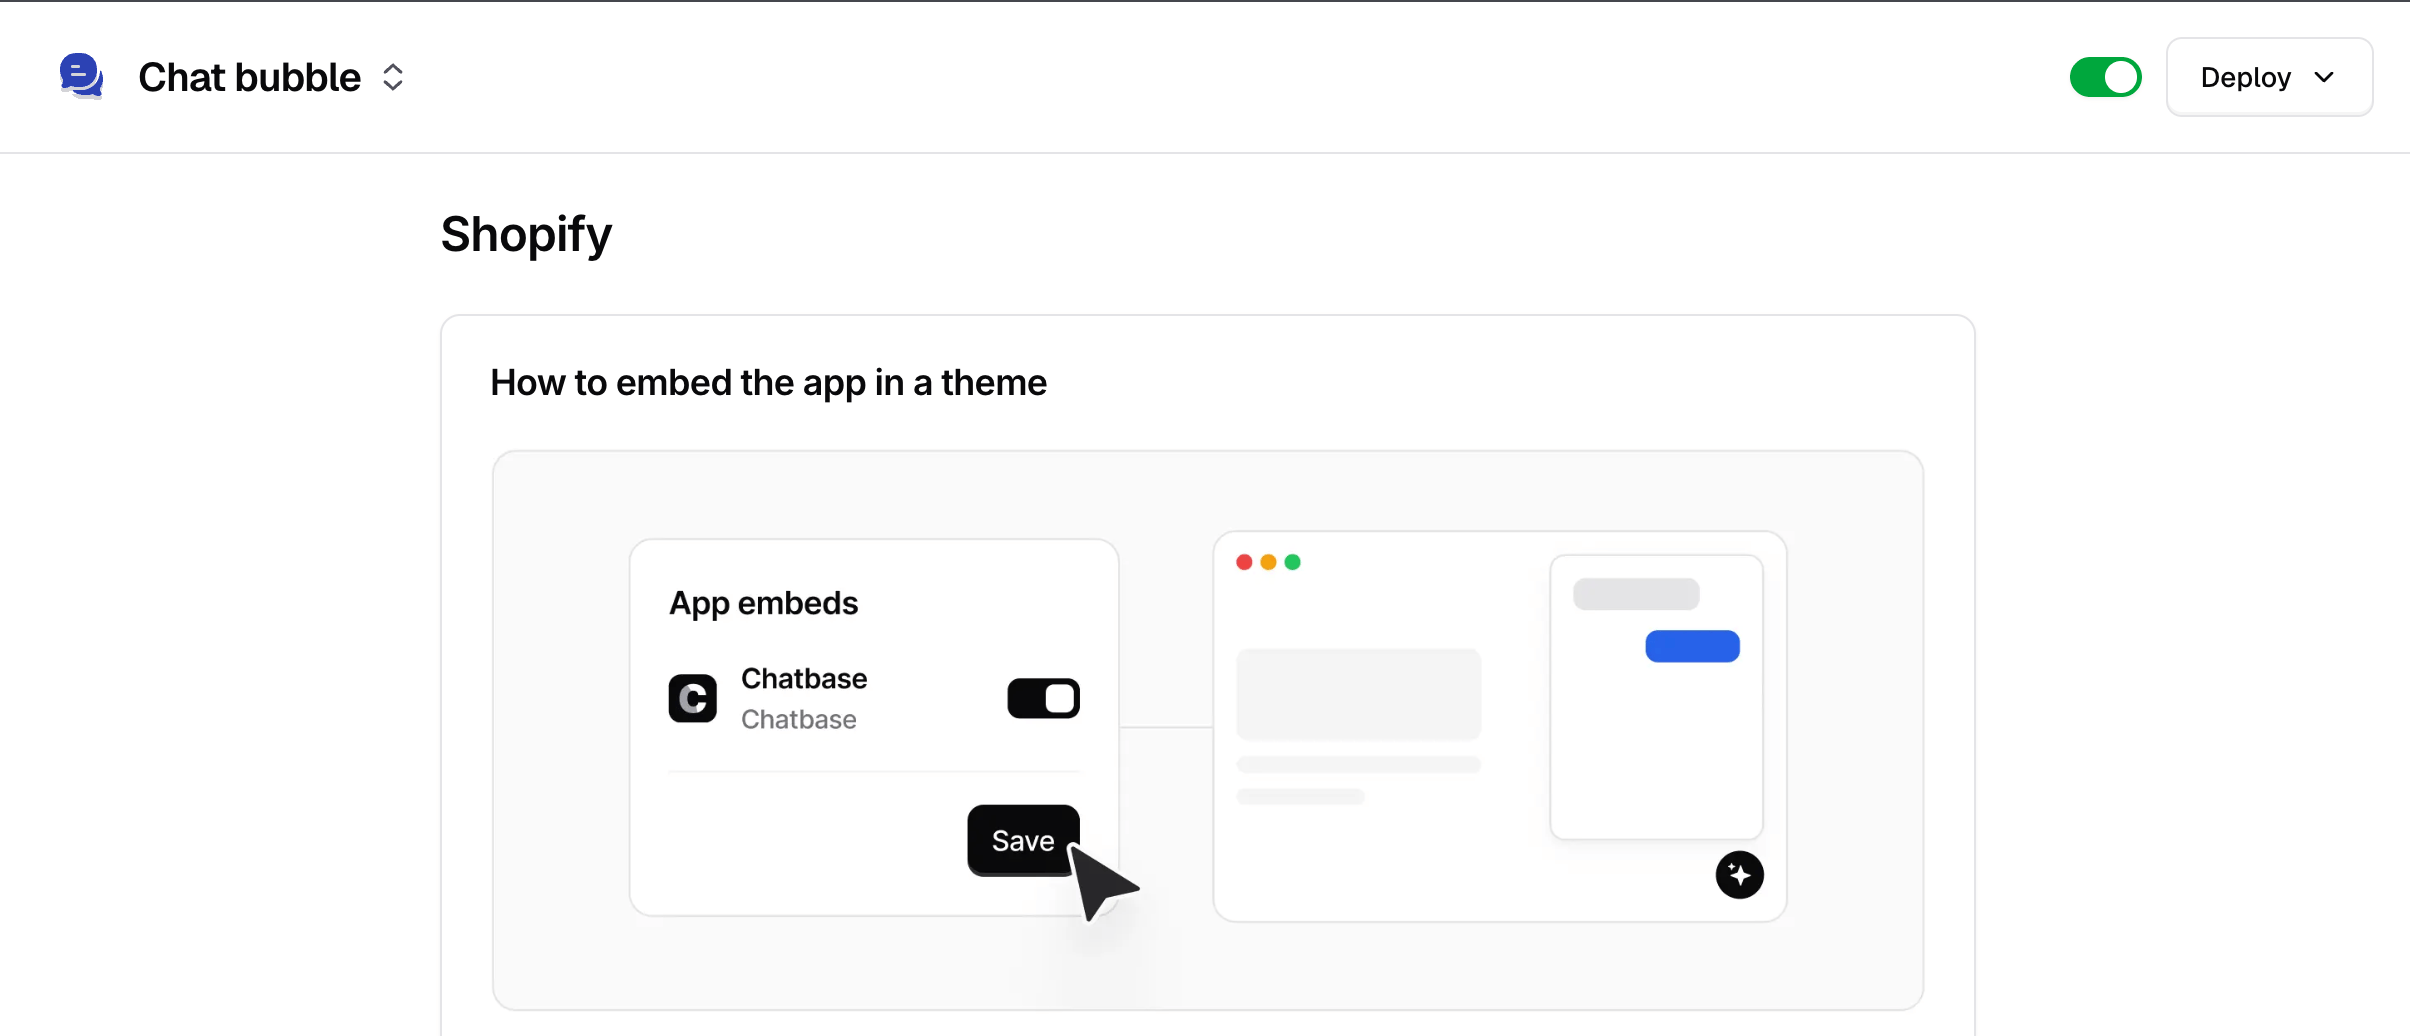
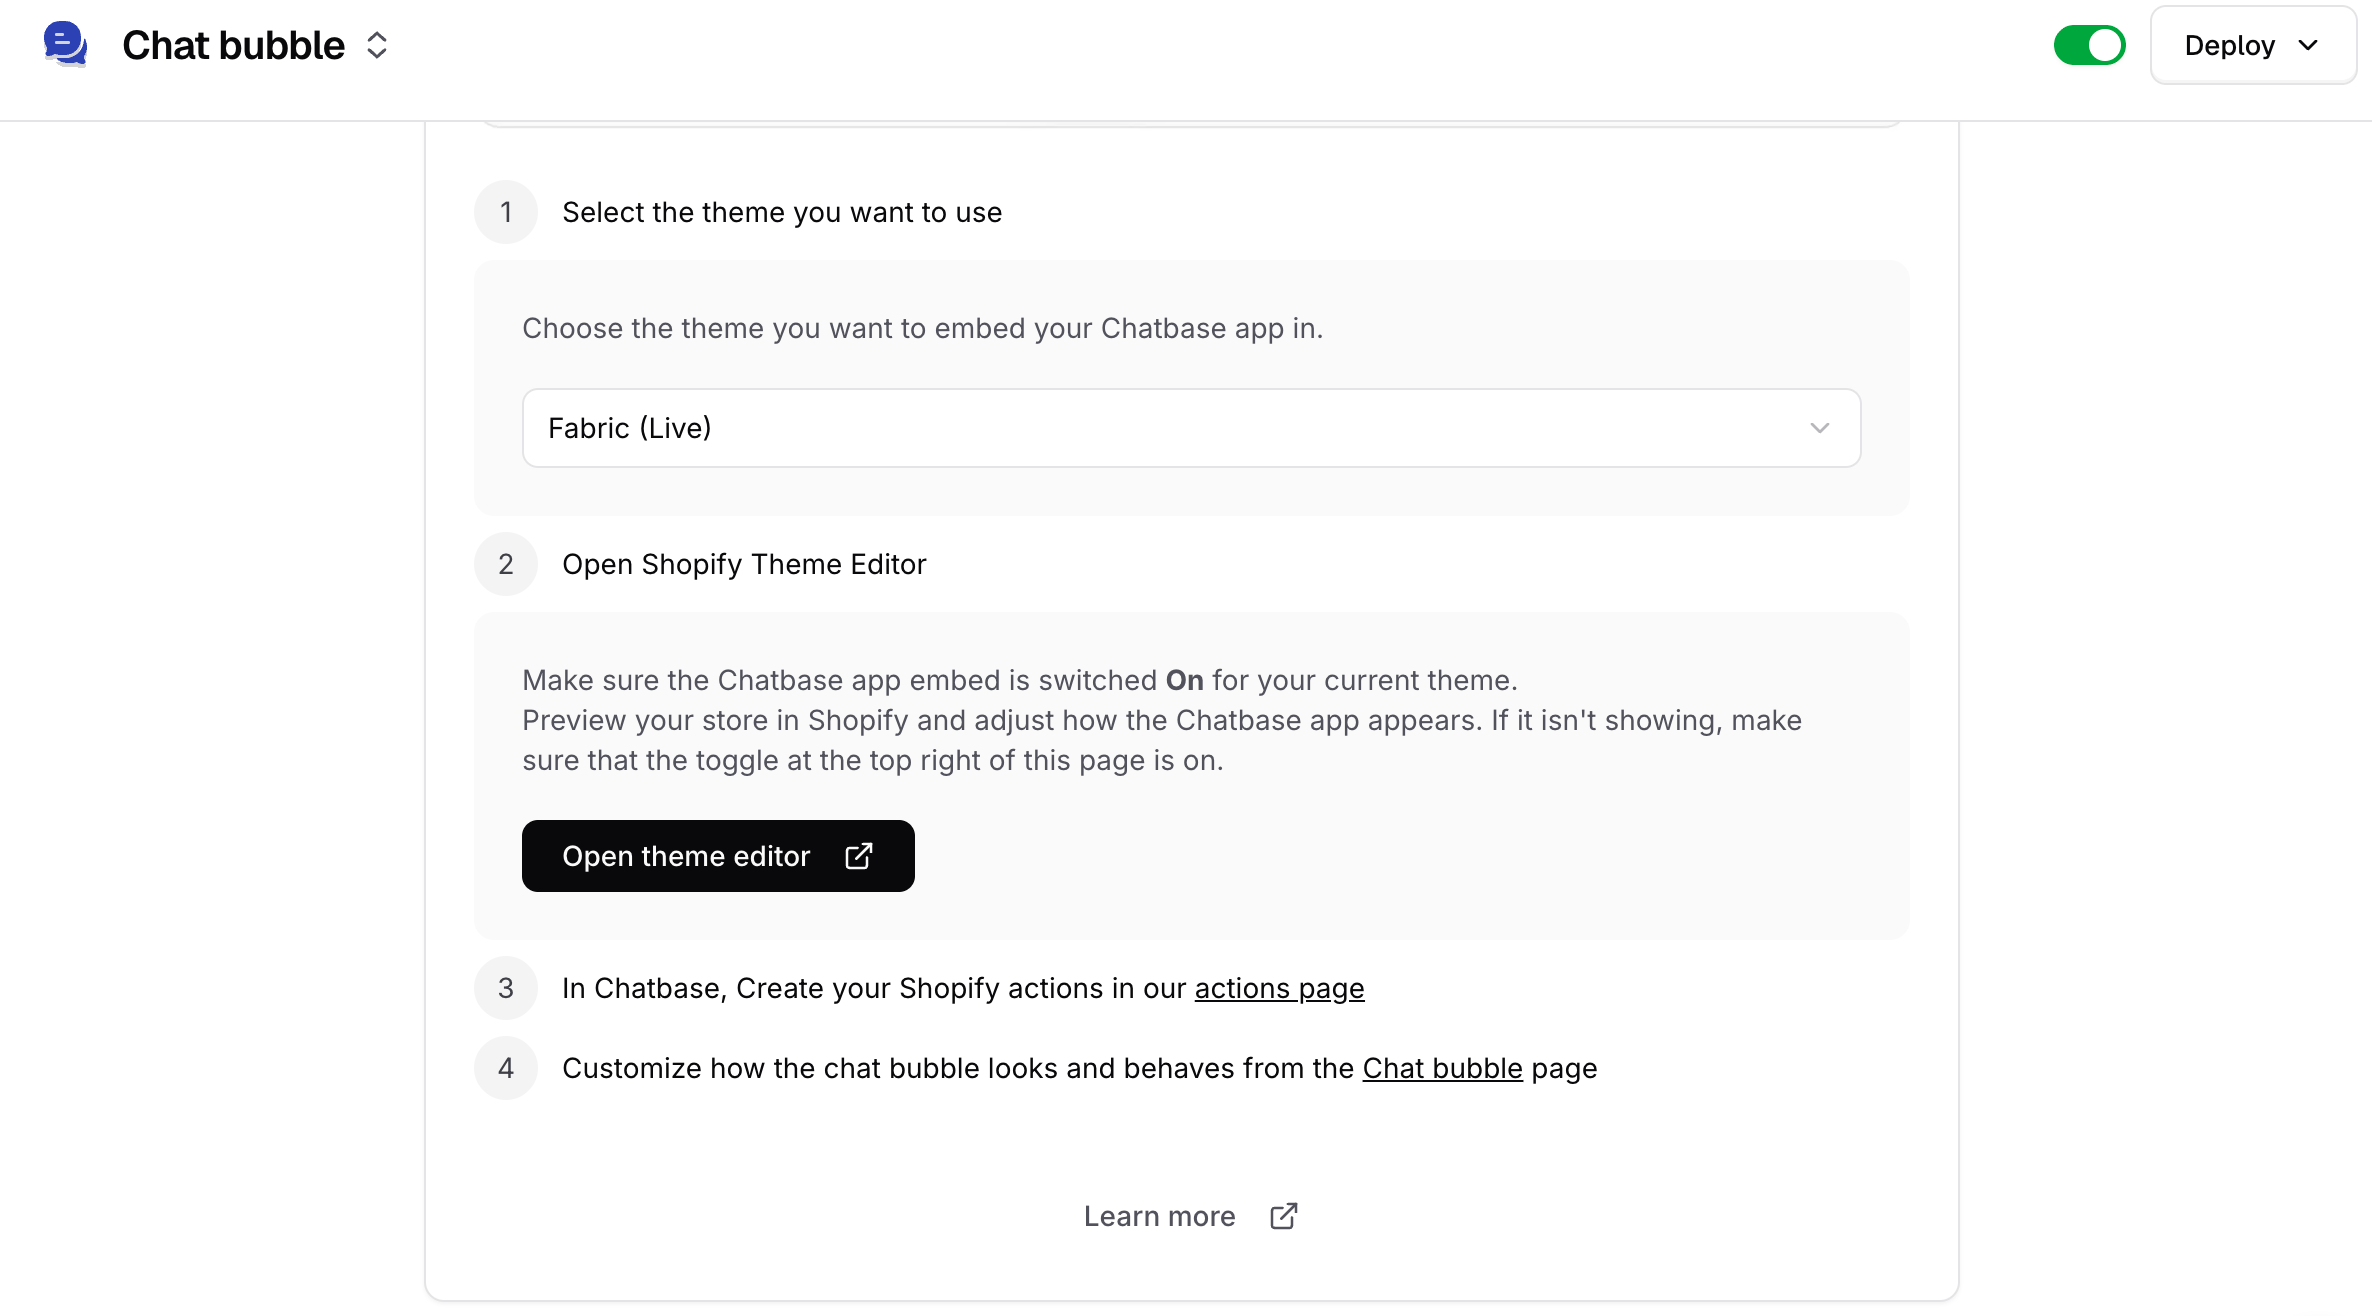
On the Channels page, click Manage on the Shopify card.Make sure the toggle at the top right of the page is on. Then choose the theme your website is currently using, open your Shopify theme editor, and make sure the Chatbase app toggle is on.
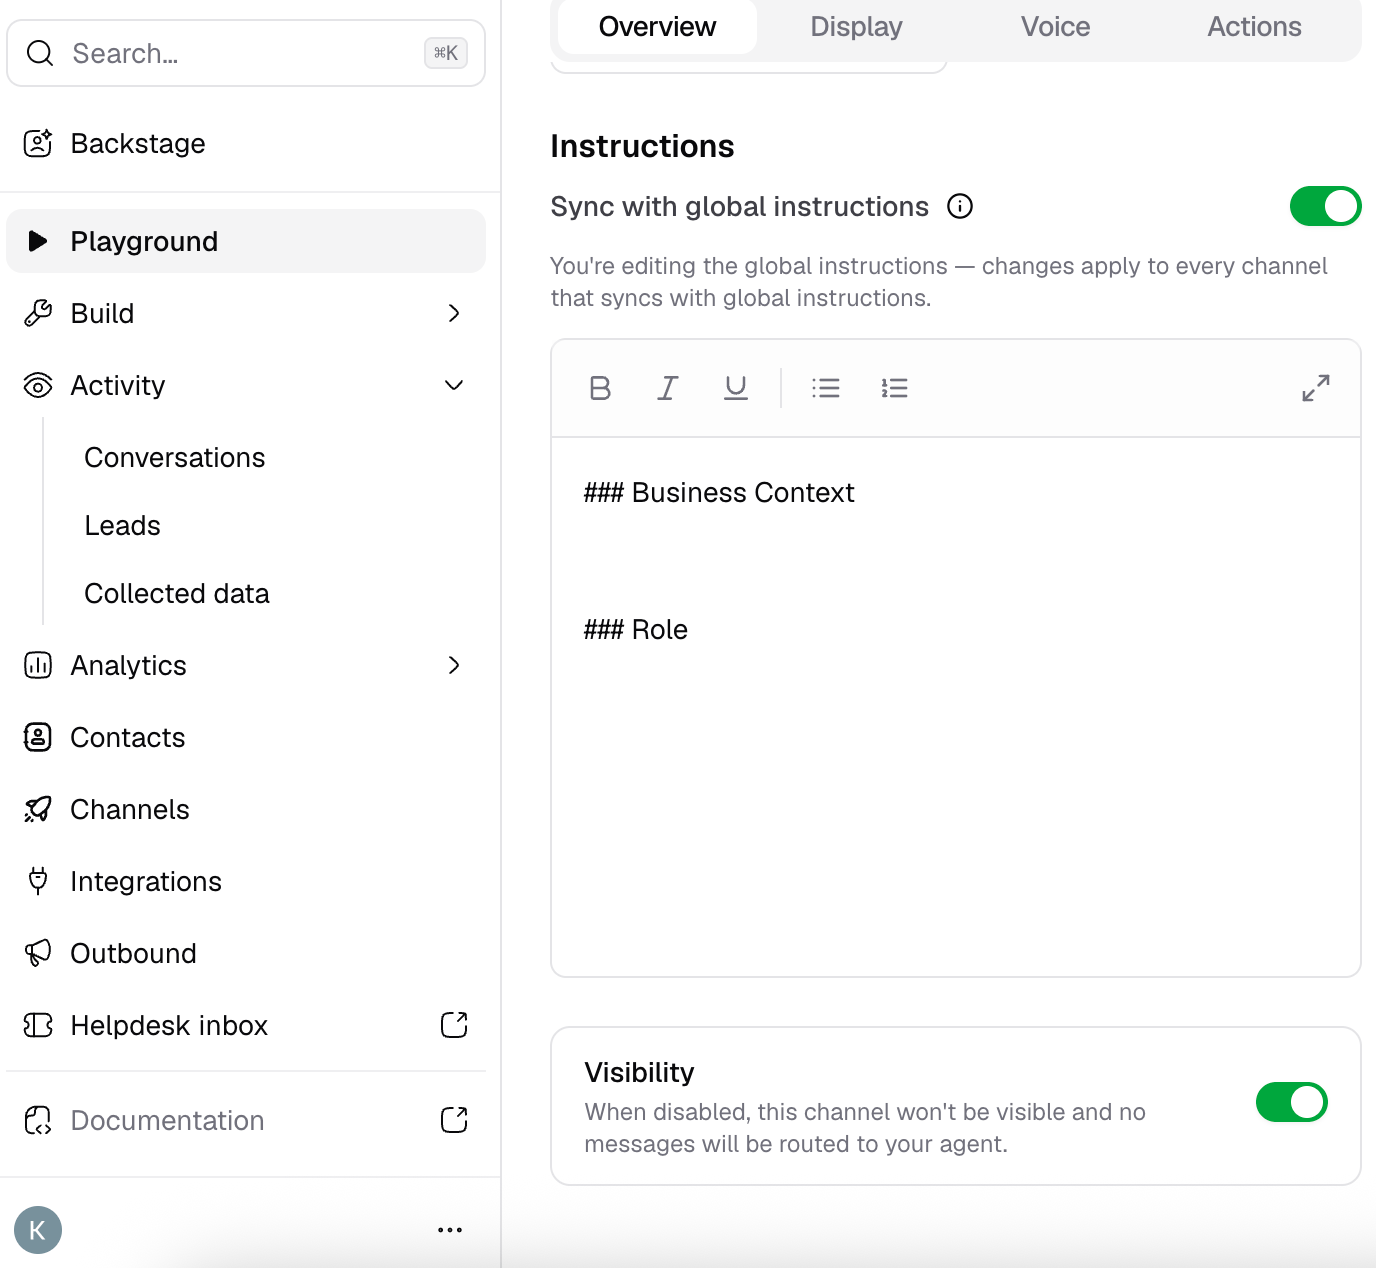
Open your storefront and confirm the Chat Bubble appears and your AI agent responds. If you can’t see the AI agent on your website, check the toggle in either of these places:
- Click Channels from the sidebar and open Chat Bubble. In the Overview tab, make sure the Visibility toggle is switched on.
- Or, on the Channels page, click Manage on the Shopify card and make sure the toggle at the top right of the page is on.
Setup checklist
Work through these steps in order to go from a connected store to an AI agent that’s ready for shoppers:- Connect your store with Method 1 or Method 2, and confirm the Chat Bubble appears on your storefront.
- Train on your store policies, not your product pages. See What to train your AI agent on.
- Create the Retrieve and display products Action and sync your catalog. See Sync your products.
- Turn on your first Actions. See Which Actions to turn on first.
- Test from your live storefront. Cart updates don’t work in the Playground, so test cart, checkout, and account flows from the Chat Bubble on your store. See Limitations.
- Publish, then add Tests. Tests run against your published AI agent, not your draft. Write a test for the requests you get most, such as “a shopper who placed order #1042 five days ago and wants to know where it is”, with Retrieve and display orders as the expected Action.
What to train your AI agent on
Shopify Actions give the AI agent your live products, carts, and orders. Data Sources give it everything else a shopper asks about: your policies and how your store works. Train on:- Shipping pages: where you ship, delivery times, and costs
- Returns and exchanges policy: the window, condition rules, and who pays return shipping
- FAQ and help center pages, size guides, care instructions, and contact details
- Answers you want worded exactly, added as Q&A sources
/products and /collections folders. See Sync your products.
When you update a Data Source, such as your returns policy, it shows Syncing while it trains and Synced once your AI agent can use it. This usually takes a few minutes, depending on the amount of content.
Which Actions to turn on first
Start with the Actions that answer the most common store questions, then add the ones that change orders once you’ve decided your rules.- Product discovery and cart: Retrieve and display products, Update cart, and Get cart.
- Order tracking: Retrieve and display orders, so “where is my order?” is answered without a ticket. It works for signed-in shoppers and for guests who verify the order.
- Returns and exchanges, once your rules are set: the same-order return completes on its own inside the Return window (days) you set, while the new-order exchange always waits for approval in the Helpdesk. To control when either one runs, call it from a Procedure. See Keeping high-stakes Actions on rails.
- Checkout: Create order, so shoppers can place the order in the chat. Turn on Update cart whenever you use Create order with Use the cart, or the cart stays empty and there’s nothing to order.
Your plan sets how many Actions an AI agent can have. See the pricing page for the limit on each plan. On Enterprise, the limit is customizable. The five Actions in steps 1, 2, and 4 cover product discovery, checkout, and order tracking.
Limitations
- One AI agent per store. Even on the Chatbase method, where you can have multiple AI agents, only a single AI agent connects to the Shopify store.
- Marketplace accounts are capped at one AI agent, have access to auto recharge credits only, and do not include the 7-day free trial.
Frequently asked questions
Do I need to add embed code to my Shopify theme?
Do I need to add embed code to my Shopify theme?
No. Installing the Chatbase Shopify app, from Chatbase or the Shopify App Store, adds the Chat Bubble to your store automatically. If you don’t see it, check that the toggle on the Shopify Manage page is on and that the Chatbase app toggle is on in your Shopify theme editor.
Should I train my AI agent on my product pages?
Should I train my AI agent on my product pages?
No. The product sync already covers your catalog. Train on your shipping, returns, and FAQ pages instead. See What to train your AI agent on.
Can the AI agent track orders for shoppers who aren't logged in?
Can the AI agent track orders for shoppers who aren't logged in?
Yes. Signed-in shoppers get their orders looked up automatically. Guests verify the order with their checkout email and order number, or their phone number and order number. If Search by confirmation number is on, guests can give the order’s confirmation number instead of the order number. See Signed-in and guest customers.
Can the AI agent cancel an order or change a shipping address?
Can the AI agent cancel an order or change a shipping address?
No. No Shopify Action cancels an order or changes the shipping address on a placed order. Route those requests to your team with Escalations.
Do Shopify Actions use more message credits?
Do Shopify Actions use more message credits?
Yes. A reply that triggers an Action costs twice the model’s usual message credits. See Credit usage.
Next steps
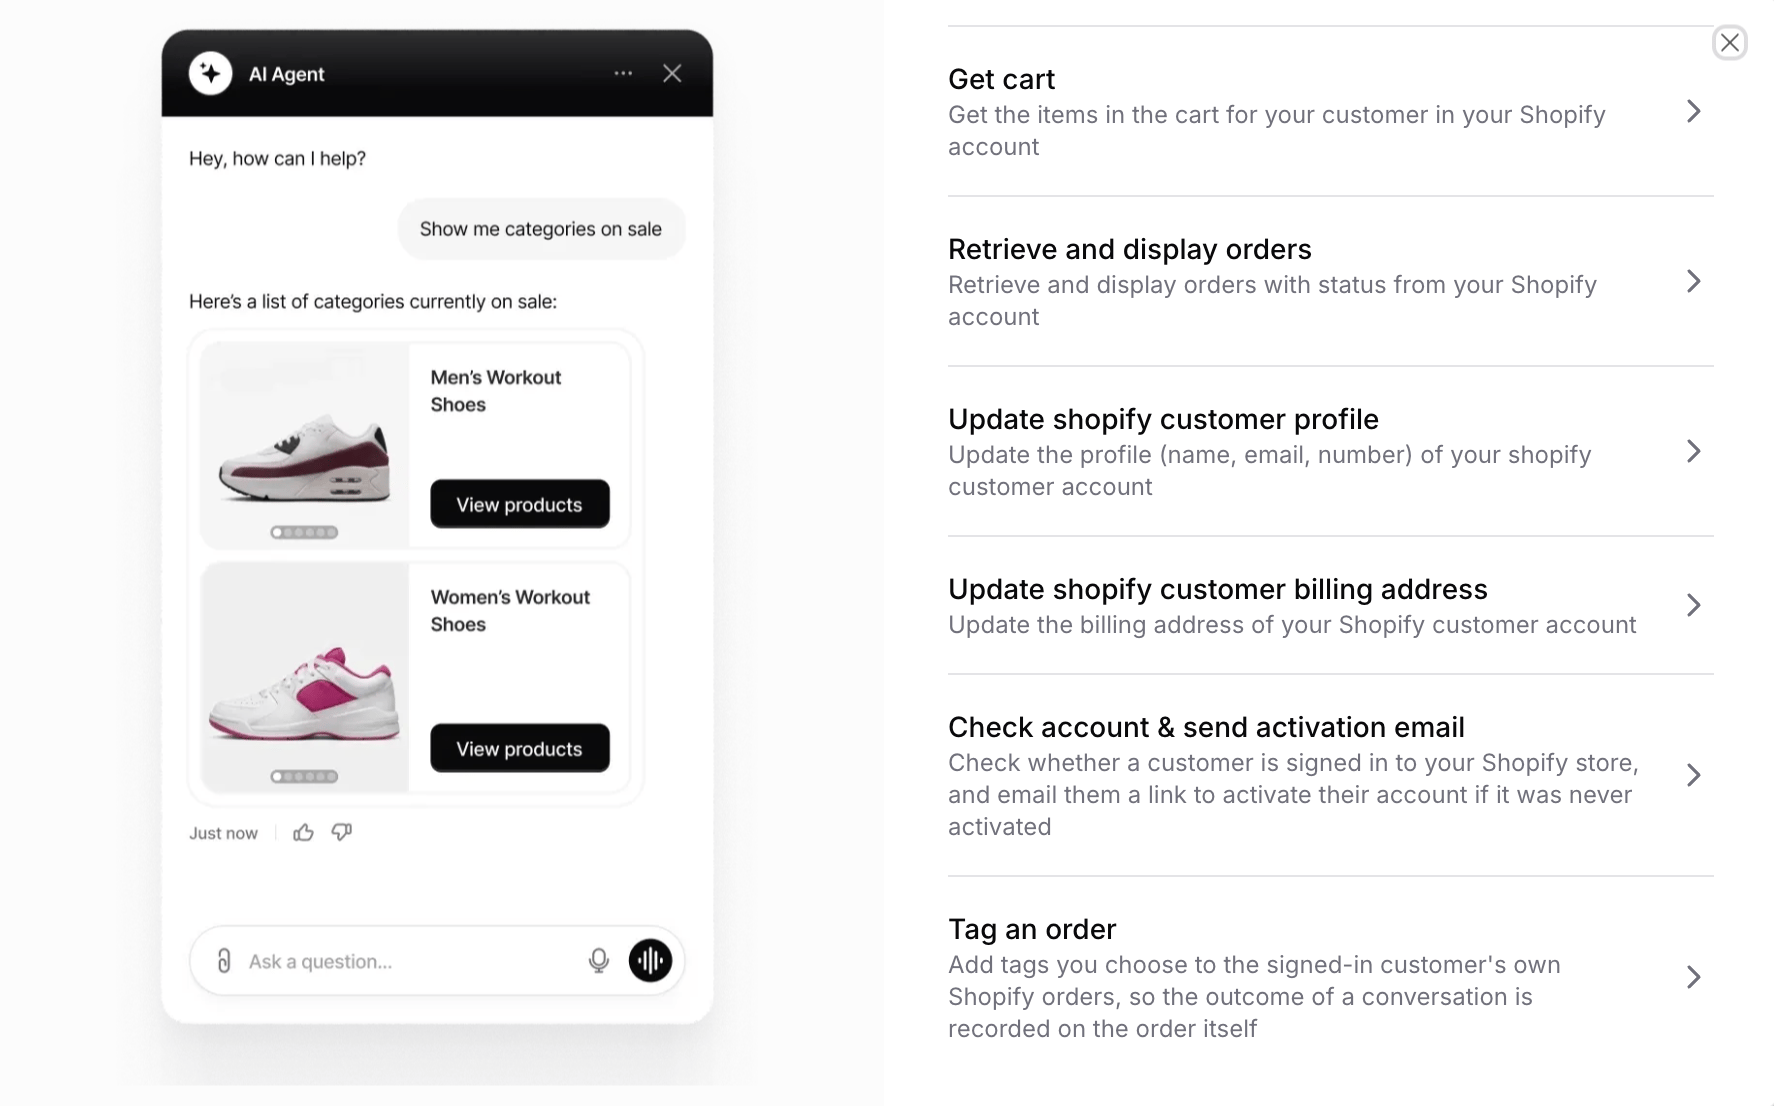
Once your store is connected, enable the Actions that let your AI agent help customers with product search, order lookups, cart management, and more.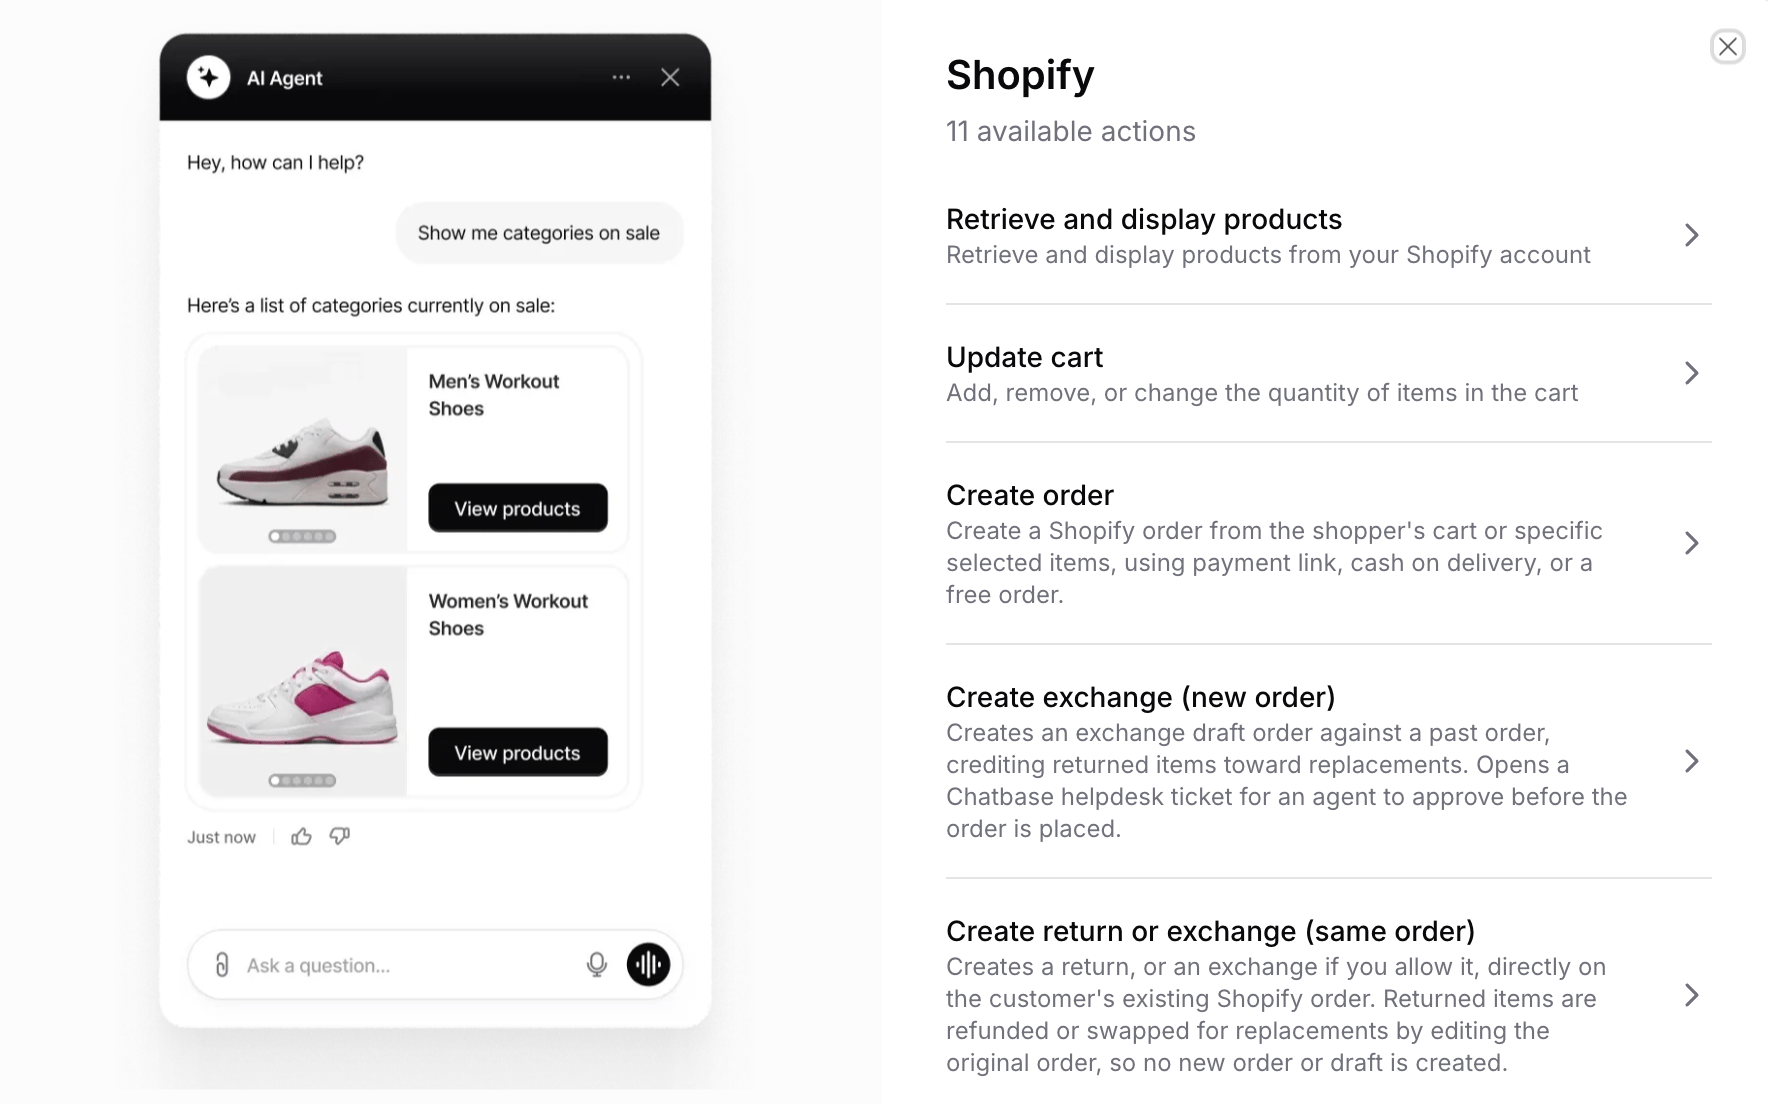
With the Retrieve and display products Action enabled, you don’t need to train your AI agent on your product or collection pages. The Action syncs your catalog directly from Shopify, so exclude
/products and /collections from your website training source. See Sync your products.Shopify Actions
Configure and use Shopify Actions to help customers browse products, manage their cart, place orders, return and exchange items, track deliveries, and update their account information.